Introduction
Picture this: A machine prints a complex bracket with integrated snap-fits, another prints a matching component with precisely aligned sockets, and a technician clicks them together in seconds—no fasteners, no tools, no waiting. This is 3D parts printing assembling in action. It combines the design freedom of additive manufacturing with smart assembly methods to create finished products faster and more efficiently than ever before. Unlike traditional manufacturing, where parts come from different sources and require complex assembly lines, 3D printing lets you build components with built-in assembly features like interlocking joints, threaded inserts, and living hinges. In this article, we'll explore how 3D parts printing and assembly work together, the techniques that make it possible, and why this combination is shaping the future of manufacturing.
What Exactly Is 3D Parts Printing Assembling?
Defining the Concept
3D parts printing assembling refers to the complete process of creating and joining 3D-printed components to form functional products. It's not just about printing individual parts—it's about designing them to work together, printing them efficiently, and assembling them into something greater than the sum of their pieces.
Think of it like building with advanced Lego blocks, except you design every block yourself to fit perfectly, have exactly the properties you need, and snap together without glue or tools.
How It Differs from Traditional Assembly
Traditional manufacturing separates part production from assembly:
- Parts come from different sources—injection molding, machining, casting
- They arrive at assembly lines with tolerances that may or may not match
- Assembly requires fixtures, tools, and trained workers
- Design changes mean new molds, new tooling, new setups
3D parts printing assembling collapses these steps:
- Parts print in the same facility, often on the same machines
- Assembly features are designed directly into components
- Tolerances match because the same digital files control production
- Design changes update instantly across all parts
Why This Matters Now
Manufacturing faces pressures that 3D printing assembly addresses directly:
- Customization demand: Customers want products tailored to them
- Speed expectations: Markets move faster than ever
- Supply chain fragility: Global disruptions taught hard lessons
- Sustainability requirements: Waste reduction is no longer optional
- Complexity needs: Products require features impossible to make traditionally
How Does the 3D Printing Process Work?
From Idea to Digital Model
Every printed part starts as a digital design. Engineers use CAD software like SolidWorks, Fusion 360, or AutoCAD to create precise 3D models. For artistic or organic shapes, sculpting tools like ZBrush offer more freedom.
During design, engineers consider not just the part's function but also how it will assemble with others. They might add:
- Snap-fit features that click together
- Alignment pins and sockets for precise positioning
- Threaded inserts for screw assembly
- Living hinges for flexible connections
- Dovetail joints for sliding assembly
Preparing for Print: The Slicing Stage
Once designs are complete, they're saved as STL files—the universal language of 3D printing. These files describe the part's surface as a mesh of triangles.
Slicing software (Cura, PrusaSlicer, Simplify3D) then:
- Orients the part for optimal printing
- Slices it into thin layers (typically 0.1-0.3mm thick)
- Generates support structures where needed
- Sets infill patterns and densities
- Creates G-code instructions for the printer
Key decisions during slicing affect assembly:
- Layer height influences surface finish at mating surfaces
- Support placement must avoid critical assembly features
- Infill density affects strength at connection points
The Printing Phase
Printers build parts layer by layer. The technology varies:
FDM (Fused Deposition Modeling) melts plastic filament and extrudes it through a nozzle. Great for large parts, functional prototypes, and assemblies requiring toughness.
SLA (Stereolithography) cures liquid resin with UV light. Produces smooth surfaces perfect for mating parts with tight tolerances.
SLS (Selective Laser Sintering) fuses nylon powder with lasers. No supports needed, ideal for complex assemblies with internal features.
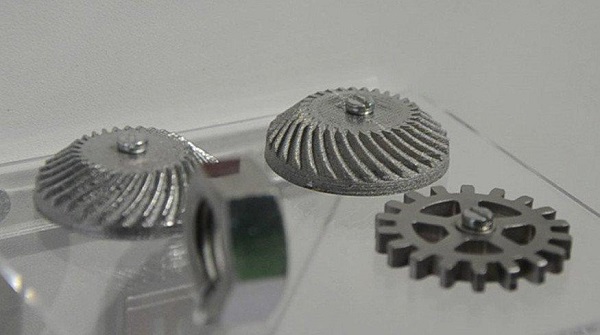
Metal printing uses lasers or electron beams to fuse metal powder. Creates production-grade parts for demanding applications.
Quality Control During Printing
Successful assembly requires consistent parts. Printers need monitoring for:
- Temperature stability—fluctuations cause dimensional changes
- Layer adhesion—weak bonds lead to assembly failure
- Dimensional accuracy—parts must fit within designed tolerances
- Surface finish—rough areas may prevent proper mating
What Assembly Techniques Work with 3D-Printed Parts?
Mechanical Fasteners
The simplest approach uses standard hardware:
Screws and bolts: Design clearance holes or threaded features into printed parts. For plastic parts, consider heat-set inserts—brass threaded inserts that melt into place, providing durable metal threads.
Snap-fits: Design flexible tabs that deflect during assembly and snap into recesses. Works best with flexible materials like nylon or specially formulated resins. A well-designed snap-fit can withstand hundreds of assembly cycles.
Rivets: For permanent connections, printed parts can accept standard rivets. Some designers print integral rivet features—posts that deform during assembly to lock parts together.
Example: A consumer electronics enclosure might use snap-fits for the main assembly (tool-free access for battery changes) plus screws for components that shouldn't be user-serviceable.
Adhesive Bonding
Glues and adhesives create strong, permanent bonds:
Cyanoacrylate (super glue) : Fast-curing, works well for small parts. Bonds instantly but can be brittle. Best for low-stress applications.
Epoxy: Two-part adhesives that cure slowly but create extremely strong bonds. Gap-filling properties help when parts don't fit perfectly. Resists heat and chemicals.
UV-curable adhesives: Cure on demand when exposed to UV light. Allows precise positioning before permanent bonding.
Structural acrylics: High-strength adhesives used in automotive and industrial applications. Impact-resistant and durable.
Surface preparation matters enormously with adhesives. Printed parts often have slightly oily residues or release agents. Cleaning with isopropyl alcohol and lightly sanding bonding surfaces improves adhesion dramatically.
Welding for Metal Parts
When printing metal components, welding creates production-grade assemblies:
Laser welding: Focused laser beam melts metal at the joint. Precise, minimal heat-affected zone. Ideal for small, detailed assemblies.
TIG welding: Traditional technique works on printed parts too. Requires skilled operators but creates strong, clean welds.
Electron beam welding: Performed in vacuum, creates deep, narrow welds. Used for critical aerospace and medical assemblies.
Friction stir welding: Mechanical process that plasticizes metal without melting. Creates extremely strong bonds with minimal distortion.
Challenge: Heat from welding can distort printed parts. Design with this in mind—add extra material at joints for post-weld machining, or design parts to be welded before final heat treatment.
Integral Attachment Features
The most elegant assemblies use features printed directly into parts:
Dovetail joints: Tapered interlocking shapes that slide together. Common in woodworking, now printed directly. Strong, permanent, and visually appealing.
Ball and socket: Spherical features that snap together, allowing articulation. Perfect for adjustable joints in prototypes and consumer products.
Hinge designs: Print mating hinge barrels with a pin channel. Insert a printed or metal pin after assembly. Some designs print the pin as part of one component.
Living hinges: Thin, flexible sections that bend repeatedly. Design them into parts that need to open and close. Works best with flexible materials like TPU or specially formulated nylon.
Bayonet mounts: Twist-to-lock connections similar to camera lens mounts. Print matching features on mating parts for tool-free assembly.
Example: A drone manufacturer prints arms with integral dovetail mounts that slide into the central body. No fasteners needed, assembly takes seconds, and arms can be replaced individually if damaged.
Hybrid Assembly
Real-world products often combine multiple techniques:
- Print major structural components with snap-fit features for initial assembly
- Add adhesive at critical joints for permanent strength
- Install metal inserts at points requiring frequent disassembly
- Use traditional fasteners where adjustability matters
- Add printed covers that snap in place for finished appearance
This hybrid approach leverages the strengths of each method while minimizing weaknesses.
What Are the Key Applications?
Aerospace: Lightweight Assemblies
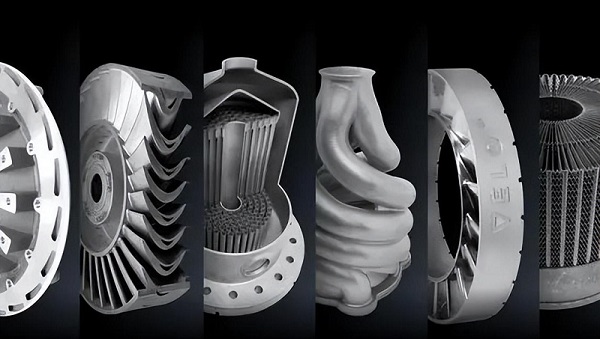
Aircraft manufacturers need strength without weight. 3D-printed assemblies deliver:
Ducting systems: Print complex air ducts with integral mounting flanges. Traditional methods require multiple parts welded together. Printed versions are lighter, have smoother internal passages, and assemble faster.
Bracket assemblies: Replace multi-piece welded brackets with single printed components. When size limits printing, design interlocking sections that assemble with integral features.
Tooling: Print assembly fixtures with built-in clamping features. Traditional fixtures require machining multiple components and bolting together. Printed versions include all features in one piece.
Example: A satellite manufacturer needed a deployment mechanism with multiple hinged arms. Printing each arm with integral hinge barrels and assembling with printed pins eliminated 50+ fasteners and reduced assembly time from days to hours.
Automotive: Customization and Speed
Car makers use printed assemblies for prototypes, custom parts, and production:
Prototype assemblies: Design and print complete dashboard assemblies overnight. Test fit, ergonomics, and function before committing to expensive tooling.
Custom interior components: Print matching sets of trim pieces with integral attachment features. Install in customer vehicles without modification.
Under-hood assemblies: Print fluid reservoirs, brackets, and ducting that snap together. Reduce parts count and assembly time.
Example: A racing team needed custom intake manifolds for their engine. Traditional fabrication would take weeks and cost thousands. They designed a multi-piece manifold that printed overnight, assembled with integral flanges and gaskets printed from flexible material.
Medical: Patient-Specific Devices
Medical devices must fit perfectly and assemble reliably:
Surgical guides: Print patient-specific guides that snap onto bone. Features include drill guides, cutting slots, and handles—all in one piece.
Prosthetic sockets: Print the main socket with integral attachment points for modular components. Assemble with standard or printed connectors.
Orthotic devices: Print multi-part braces that adjust to patient needs. Snap-fit features allow component swapping as treatment progresses.
Example: A hospital needed custom cranial implants for a series of patients. Each implant printed with integral tabs for attaching to the skull. Surgeons placed implants, bent the tabs, and secured with screws—procedure time dropped by 40%.
Consumer Products: From Prototype to Production
Product developers embrace printed assemblies for speed and flexibility:
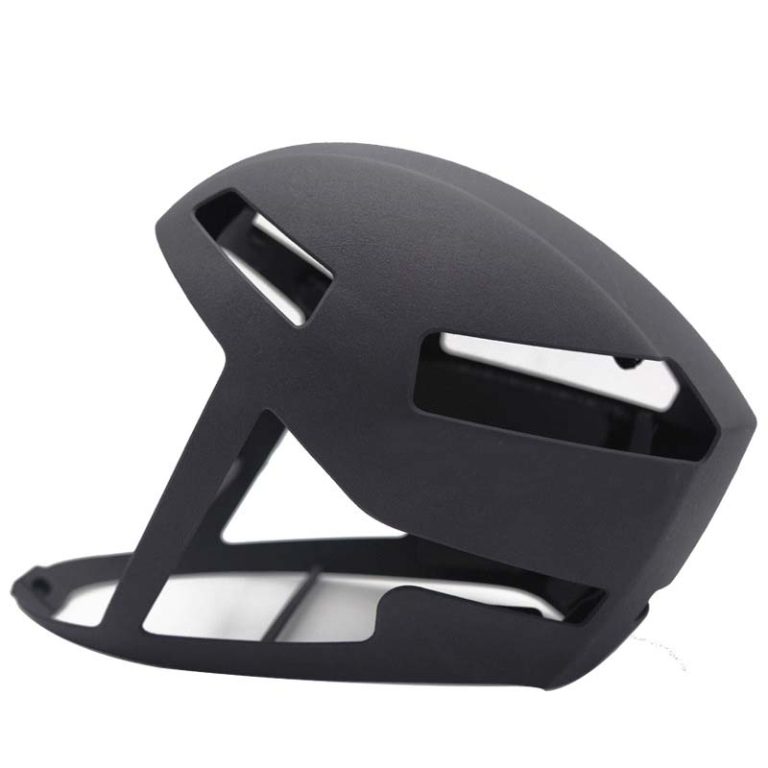
Electronics enclosures: Print cases with integral standoffs, snap-fit covers, and mounting features for PCBs. Assemble electronics, snap closed—no screws needed.
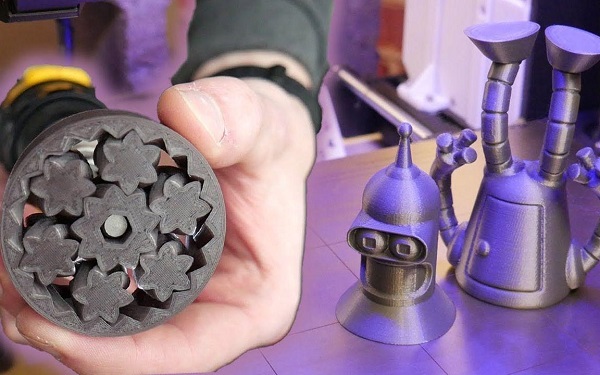
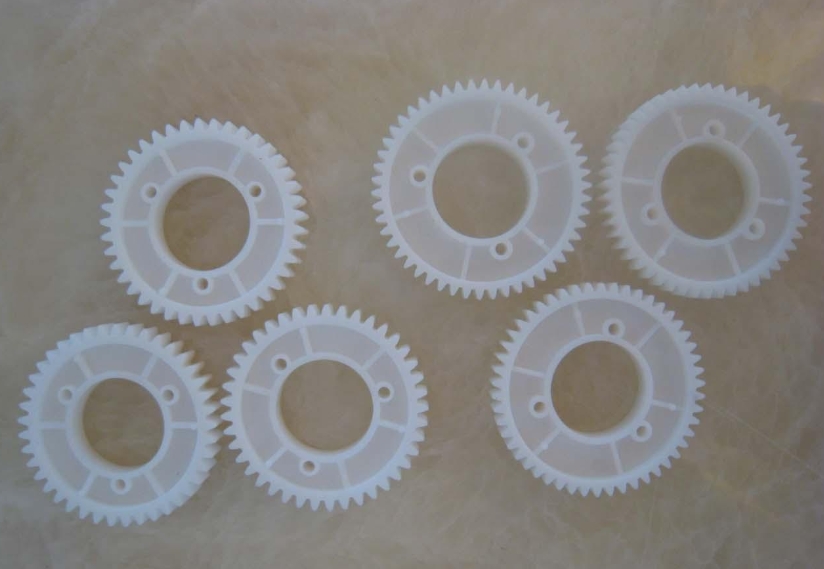
Mechanical products: Print gear trains with integral bearings and shafts. Assemble moving parts, test function, iterate design—all without tooling.
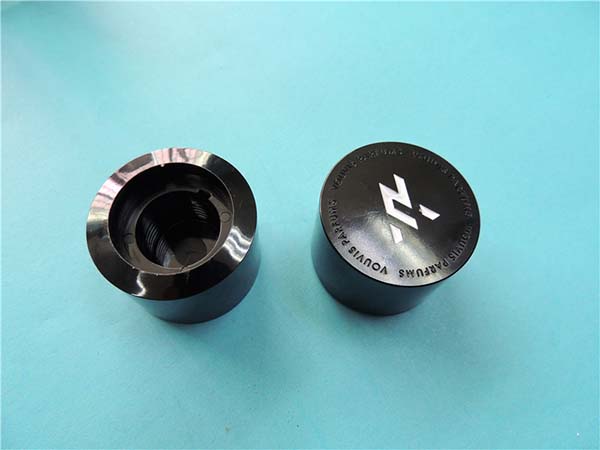
Custom hardware: Print matching sets of knobs, handles, and trim pieces for appliances or furniture. Install with integral attachment features.
Example: A startup developing a new kitchen gadget went from concept to production-ready design in 3 months using printed assemblies. They tested snap-fit durability, hinge function, and ergonomics with each iteration. Final design transferred to injection molding with confidence because every detail had been validated.
What Are the Design Considerations?
Tolerances and Fit
Printed parts don't match machined precision exactly. Design with realistic expectations:
| Material | Typical Tolerance | Best Practice |
|---|---|---|
| FDM plastic | ±0.2-0.5mm | Design clearance for moving parts |
| SLA resin | ±0.1-0.2mm | Test-fit critical interfaces |
| SLS nylon | ±0.1-0.3mm | Allow post-processing for precision fits |
| Metal | ±0.05-0.1mm | Machine critical surfaces after printing |
Rule of thumb: For snap-fits, design 0.2-0.3mm interference for secure connection. For sliding fits, allow 0.2-0.5mm clearance depending on material and printer capability.
Anisotropy and Strength
Printed parts are stronger in some directions than others. Layer orientation affects:
- Snap-fit strength: Orient flexible features to print in the strongest direction
- Hinge durability: Living hinges should print with layers perpendicular to bending axis
- Screw retention: Threaded features need orientation that maximizes layer bonding
Assembly Sequence
Design parts with assembly order in mind:
- Which parts must install first?
- Are access points available for tools?
- Can subassemblies be tested before final assembly?
- Is disassembly possible for maintenance?
Digital assembly simulation helps identify issues before printing. Software like Autodesk Fusion 360 or SolidWorks lets you virtually assemble components, check interferences, and verify motion.
Post-Processing Considerations
Printed parts often need finishing before assembly:
- Remove support material from mating surfaces
- Sand rough areas that affect fit
- Clean holes and threads of debris
- Apply surface treatments (painting, coating) before assembly
- Heat-set inserts require precise positioning
What Challenges Must You Overcome?
Material Limitations
Not all 3D-printable materials suit all assembly methods:
- Some plastics crack when using snap-fits
- Adhesives don't bond certain materials well
- Heat from welding may damage nearby features
- UV exposure degrades some materials over time
Solution: Match material to assembly method. Test small samples before committing to full production.
Accuracy Variations
Even well-tuned printers show variation:
- First layers may be slightly compressed
- Tall parts can lean slightly
- Cooling causes shrinkage
- Different printers produce different results
Solution: Design for these variations. Include adjustment features where possible. Test-print critical interfaces before full production runs.
Skill Requirements
Successful printed assemblies need expertise in:
- Design for additive manufacturing (DfAM)
- Material properties and selection
- Assembly technique selection
- Quality inspection methods
Solution: Partner with experienced providers like Yigu Technology. Leverage our expertise while building internal capabilities.
Cost Considerations
Printed assemblies can cost more per part than mass-produced equivalents. The value comes from:
- Eliminating tooling costs
- Reducing assembly labor
- Enabling customization
- Accelerating time to market
- Lowering inventory costs
Solution: Calculate total cost of ownership, not just per-part price. Include tooling, inventory, and changeover costs in your analysis.
How Does This Compare to Traditional Assembly?
| Factor | Traditional Assembly | 3D-Printed Assembly |
|---|---|---|
| Tooling cost | High (molds, fixtures) | None to minimal |
| Per-part cost (low volume) | High | Moderate |
| Per-part cost (high volume) | Low | High |
| Design flexibility | Limited by tooling | Unlimited |
| Assembly features | Added in secondary ops | Designed in |
| Lead time | Weeks to months | Days |
| Inventory | Physical stock | Digital files |
| Customization | Expensive | Free |
What Does the Future Hold?
Multi-Material Printing
Printers that combine materials in single jobs will revolutionize assembly. Imagine printing:
- Rigid structural parts with flexible snap-fits
- Conductive traces for integrated electronics
- Color-coded assembly indicators
- Dissolvable supports that wash away, leaving assembled mechanisms
4D Printing
Parts that assemble themselves when triggered by heat, moisture, or light. Researchers have demonstrated flat sheets that fold into complex 3D shapes when heated. Future products might ship flat and self-assemble at their destination.
Automated Assembly Systems
Robots that pick printed parts and assemble them without human intervention. Vision systems identify parts, grippers handle them gently, and assembly algorithms optimize sequence. Small-batch production becomes automated.
Digital Inventory
Instead of storing physical assemblies, companies store digital files. When an assembly is needed, they print components and assemble locally. No inventory costs, no obsolescence, no shipping delays.
Conclusion
3D parts printing assembling isn't just about making parts—it's about rethinking how products come together. By designing assembly features directly into components, choosing the right joining methods, and leveraging digital workflows, manufacturers can create products faster, with less waste, and with unprecedented customization. From aerospace brackets that snap together to medical implants that fit perfectly, this approach delivers real value today. At Yigu Technology, we've helped clients across industries implement printed assemblies that reduce costs, speed development, and enable designs previously impossible. The future of manufacturing is being assembled piece by piece, layer by layer.
FAQs
What's the strongest way to assemble 3D-printed parts?
For permanent connections, adhesive bonding with epoxy or welding for metal parts provides maximum strength. For designs needing disassembly, mechanical fasteners with heat-set inserts offer durability and serviceability. The strongest approach depends on materials and application.
Can 3D-printed parts be disassembled and reassembled?
Yes, if designed properly. Use mechanical fasteners (screws, bolts) or snap-fits rated for multiple cycles. Some designs incorporate threaded inserts that withstand repeated assembly. Avoid permanent methods like adhesives or welding if disassembly matters.
How do I ensure 3D-printed parts fit together correctly?
Start with accurate 3D models and understand your printer's capabilities. Test-print critical interfaces before full production. Design with appropriate clearances (0.2-0.5mm for most applications). Consider post-processing like sanding or machining for precision fits.
What software helps design assemblies for 3D printing?
CAD software like SolidWorks, Fusion 360, and Onshape includes assembly modeling features. Slicing software helps optimize individual parts. Specialized tools like Netfabb offer assembly simulation and optimization for additive manufacturing.
Can I print parts that move without assembly?
Yes! Print-in-place mechanisms like hinges, gears, and linkages can print as single pieces. After printing, break them free from any support material, and they move. This technique works best with SLS nylon or well-tuned resin printers.
Contact Yigu Technology for Custom Manufacturing
Ready to explore 3D parts printing assembling for your next project? At Yigu Technology, we combine additive manufacturing expertise with practical assembly experience. Our team helps you design parts that print efficiently and assemble perfectly. Whether you need prototypes, custom components, or production runs, we deliver quality results with fast turnaround. Contact us today to discuss your requirements. We'll provide professional guidance and competitive pricing, helping you assemble your future piece by piece.