Introduction
In the ever - evolving landscape of modern manufacturing, 3D printing services have emerged as a revolutionary force, unlocking the potential of additive manufacturing for a wide array of projects. This technology, once a niche concept, has now become a mainstream solution across industries, from aerospace and automotive to healthcare and consumer goods.
3D printing, also known as additive manufacturing, is the process of creating three - dimensional objects from a digital file. It works by layering materials, such as plastics, metals, ceramics, or composites, one on top of the other, following the precise instructions encoded in the digital model. This stands in stark contrast to traditional manufacturing methods, which often rely on subtractive processes like cutting, milling, or carving away material from a larger block.
The significance of 3D printing services lies in their ability to break free from the constraints of traditional manufacturing. For Yigu Technology instance, traditional manufacturing often requires expensive molds or tooling, which can be a significant barrier, especially for small - scale production runs or prototypes. With 3D printing, the digital model serves as the only "tool" needed, enabling rapid production and easy modification.
The Mechanics of 3D Printing Services
To fully understand how 3D printing services unlock additive manufacturing for projects, it's essential to break down the process into its fundamental steps: modeling, slicing, printing, and post - processing. Each step plays a crucial role in transforming a digital concept into a physical object.
Modeling
The journey of 3D printing begins with creating a three - dimensional model of the object to be printed. This can be achieved in two primary ways: using Computer - Aided Design (CAD) software or 3D scanners.
CAD Software: CAD software offers a highly customizable and precise way to design 3D models. Designers and engineers can use a variety of tools within CAD programs to create complex geometries. For Yigu Technology example, in SolidWorks, one of the leading CAD software, users can start with basic geometric shapes like cubes, cylinders, and spheres and then use operations such as extruding, revolving, and lofting to build more intricate structures. Consider the design of a custom - made mechanical part. Using CAD, the engineer can accurately define the part's dimensions, tolerances, and internal features. They can also simulate how the part will interact with other components in a virtual environment before proceeding with the printing process.
3D Scanners: These devices are incredibly useful when the goal is to replicate an existing object or capture a real - world shape for 3D printing. There are different types of 3D scanners, such as structured - light scanners and laser scanners. Structured - light scanners work by projecting a pattern of light onto the object and then using cameras to capture how the pattern deforms on the object's surface. This data is then used to create a 3D model. For instance, in the field of archaeology, 3D scanners can be used to create replicas of ancient artifacts. A 3D scan of a delicate ceramic vase can preserve its unique shape and details, allowing for reproduction through 3D printing. This not only helps in the study of the artifact but also provides a way to create replicas for display purposes without risking damage to the original.
During the modeling process, several factors need to be considered. The size of the object is crucial, as it must be within the build volume of the 3D printer. For Yigu Technology example, a consumer - grade FDM (Fused Deposition Modeling) 3D printer might have a build volume of 200 x 200 x 200 mm. If the model exceeds these dimensions, it will need to be scaled down or split into smaller parts for printing. The shape of the object also matters. Complex geometries with overhangs or intricate internal structures may require additional support structures during printing, which should be designed into the model.
Slicing
Once the 3D model is created, it needs to be prepared for the 3D printer. This is where the slicing process comes in. Slicing software takes the 3D model and divides it into a series of thin, horizontal layers. Each layer represents a cross - section of the final object.
The slicing software has a range of parameters that need to be set, depending on the type of 3D printer and the material being used. One of the most important parameters is the layer height. A smaller layer height results in a smoother surface finish but increases the printing time. For Yigu Technology example, a layer height of 0.1 mm will produce a much finer - detailed print compared to a layer height of 0.3 mm, but it will take significantly longer to print. The fill density is another critical parameter. This determines how much of the interior of the object is filled with material. A high fill density, such as 100%, will result in a solid object, which is suitable for applications that require high strength. However, for objects where weight is a concern, like in aerospace components, a lower fill density, say 20 - 30%, can be used. This creates a lattice - like internal structure that reduces weight while still maintaining a reasonable level of strength.
The slicing software also generates the toolpath for the 3D printer. This is the path that the printer's extruder (in the case of FDM printers) or laser (in the case of SLS - Selective Laser Sintering printers) will follow to deposit the material layer by layer. The toolpath is optimized to minimize travel time and ensure efficient printing. For example, the software may use algorithms to group together areas of the same layer that can be printed consecutively, reducing the amount of time the extruder or laser has to move between different parts of the layer.
Printing
The printing stage is where the magic happens. The 3D printer reads the sliced file and starts depositing material layer by layer according to the instructions in the file.
FDM Printers: In FDM 3D printers, the most common type of consumer - grade printers, a spool of thermoplastic filament (such as PLA - Polylactic Acid, ABS - Acrylonitrile Butadiene Styrene) is fed into an extruder. The extruder heats the filament to its melting point and then extrudes it through a nozzle. The nozzle moves in the X - Y plane, following the toolpath generated during the slicing process, while the build platform moves down in the Z - direction after each layer is printed. For Yigu Technology example, if you are printing a small plastic figurine, the printer will start by laying down the first layer of melted PLA filament on the build platform, creating the base of the figurine. As it continues to print layer by layer, the details of the figurine, such as its facial features and clothing, gradually take shape.
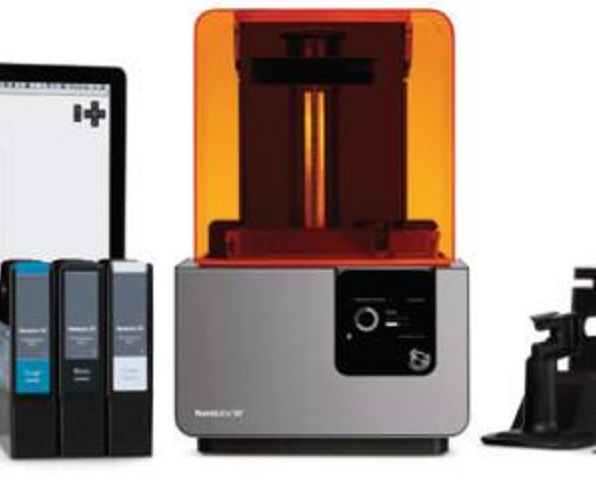
SLA Printers: Stereolithography (SLA) printers use a different principle. They use a laser to cure a liquid photopolymer resin layer by layer. The build platform starts at the bottom of a resin tank. The laser traces the pattern of the first layer on the surface of the resin, curing it. After the first layer is cured, the build platform is raised slightly, and a new layer of resin is spread over the cured layer. The laser then traces the pattern of the second layer, bonding it to the first layer. SLA printers are known for their high - resolution prints, making them ideal for applications such as jewelry making, where intricate details are crucial. For example, a jeweler can use an SLA printer to create a highly detailed wax - like model of a ring setting, which can then be used in the lost - wax casting process to create a metal ring.
SLS Printers: Selective Laser Sintering (SLS) printers work with powdered materials, such as nylon or metal powders. A thin layer of powder is spread across the build platform. A high - power laser then selectively sinters (fuses) the powder particles together in the shape of the cross - section of the object for that layer. Once a layer is complete, a new layer of powder is spread, and the process repeats. SLS printers are often used in industrial applications, such as manufacturing automotive parts or aerospace components, due to their ability to work with high - performance materials and produce parts with good mechanical properties.
Post - processing
After the 3D printer has completed its job, the printed object usually requires some post - processing to meet the final requirements.
Removing Support Structures: If the object had overhangs or complex geometries during printing, support structures were likely added during the slicing process to prevent the overhanging parts from collapsing. These support structures need to be removed. In the case of FDM prints, the supports are usually made of the same material as the object and can be manually broken off or cut away. For more delicate prints, such as those made with SLA printers, the supports may be removed using a combination of pliers and a sharp blade. After removing the supports, there may be small marks or protrusions left on the object's surface, which can be smoothed out.
Sanding and Polishing: To achieve a smooth surface finish, the printed object can be sanded. Coarse - grit sandpaper can be used first to remove any large imperfections or rough spots, followed by finer - grit sandpaper to achieve a smoother finish. For an even higher - quality finish, polishing compounds can be used. This is especially important for objects that require an aesthetically pleasing appearance, such as consumer products or art pieces. For Yigu Technology example, a 3D - printed smartphone case can be sanded and polished to give it a sleek, professional look.
Painting and Coating: Adding a coat of paint or a protective coating can enhance the appearance and durability of the 3D - printed object. Different types of paints and coatings are available, depending on the material of the printed object and the desired effect. For example, a metal - 3D - printed part can be coated with a corrosion - resistant paint, while a plastic - printed object can be painted with a high - gloss enamel paint to give it a shiny finish. In some cases, a clear coat can be applied to protect the surface and add a layer of shine.
Types of 3D Printing Technologies and Their Suitability for Projects
FDM (Fused Deposition Modeling)
FDM is one of the most well - known and widely used 3D printing technologies, especially in the consumer and small - scale commercial sectors. The underlying principle of FDM is relatively straightforward. A spool of thermoplastic filament, such as PLA (Polylactic Acid) or ABS (Acrylonitrile Butadiene Styrene), is fed into an extruder. The extruder heats the filament to its melting point, typically between 180 - 250°C depending on the material. Once melted, the plastic is extruded through a nozzle, which moves in the X - Y plane according to the instructions from the sliced 3D model. As the material is deposited, it cools and solidifies, bonding to the previous layer. After each layer is completed, the build platform moves down (or the extruder moves up) in the Z - direction, and the process repeats until the entire 3D object is formed.
SLA (Stereolithography)
SLA is a 3D printing technology that uses a laser to cure a liquid photopolymer resin layer by layer, creating a solid 3D object. In an SLA printer, the build platform is initially positioned at the bottom of a resin tank, which is filled with a photosensitive liquid resin. A laser, typically a UV (Ultraviolet) laser, is directed onto the surface of the resin. The laser traces the pattern of the first layer of the 3D model, as defined by the sliced file, onto the resin. The exposure to the laser causes the resin in that area to polymerize and solidify, forming the first layer of the object. After the first layer is cured, the build platform is lowered slightly, and a new layer of resin is spread over the cured layer. The laser then traces the pattern of the second layer, bonding it to the first layer, and the process continues until the entire object is complete.
SLS (Selective Laser Sintering)
SLS is a 3D printing process that uses a high - power laser to sinter powdered materials, such as nylon, polyamide, or metal powders, into a solid three - dimensional object. The process begins with a powder bed. A thin layer of powder, typically around 0.05 - 0.15 mm thick, is spread evenly across the build platform using a recoater mechanism. The laser then scans the surface of the powder layer, selectively melting or sintering the powder particles in the areas corresponding to the cross - section of the 3D model for that layer. As the laser heats the powder, the particles fuse together, forming a solid layer. Once a layer is complete, the build platform is lowered by the thickness of one layer, and a new layer of powder is spread over the previously sintered layer. The laser then scans the next layer, and the process repeats until the entire object is built.
DMLS (Direct Metal Laser Sintering)
DMLS is a specialized form of 3D printing that is specifically designed for metal additive manufacturing. It shares some similarities with SLS but is optimized for working with metal powders. In DMLS, a high - power laser is used to selectively melt metal powder particles, layer by layer, to create a fully dense metal object. The process starts with a powder bed, similar to SLS. A thin layer of metal powder, typically a few tens of micrometers thick, is spread across the build platform. The laser then scans the powder layer, melting the powder in the areas defined by the 3D model's cross - section. The melted powder fuses together, and as the layers are built up, the final part has the mechanical properties of the base metal.
Case Studies: Real - world Applications
Case 1: Automotive Industry
A leading automotive company, let's call it AutoTech, was looking to develop a new line of high - performance sports cars. One of the key challenges they faced was the production of complex engine components, such as the intake manifold.
Traditional Manufacturing Approach:
Using traditional manufacturing methods, the production of the intake manifold involved multiple steps. First, a mold had to be created, which was a time - consuming and expensive process. The mold was then used to cast the manifold from a metal alloy. After casting, the part required extensive machining to achieve the precise dimensions and smooth surfaces needed for optimal engine performance. The total cost of producing a single intake manifold using traditional methods was approximately $500, and the production time from design to a finished part was around 8 weeks.
3D Printing Solution:
AutoTech decided to explore 3D printing for the production of the intake manifold. They used a DMLS (Direct Metal Laser Sintering) 3D printer, which was capable of working with high - strength metal powders. The design of the intake manifold was optimized using CAD software to take advantage of the design freedom offered by 3D printing. Complex internal channels and structures were added to improve the flow of air into the engine, which was difficult to achieve with traditional manufacturing.
Cost and Performance Analysis:
The cost of materials for 3D printing the intake manifold was around \(200, and the cost of operating the 3D printer, including energy and maintenance, added another \)100, bringing the total cost per part to $300. This represented a 40% cost reduction compared to traditional manufacturing. In terms of performance, the 3D - printed intake manifold showed a 15% improvement in air - flow efficiency, which translated to a 10% increase in engine power and a 5% improvement in fuel efficiency.
Time - to - Market:
The time from design to a finished 3D - printed part was only 2 weeks. This significant reduction in the development cycle allowed AutoTech to bring their new sports car to market much faster. They were able to make design iterations quickly and test different versions of the intake manifold in a shorter time frame, giving them a competitive edge in the market.
Case 2: Healthcare Sector
A large hospital, City General Hospital, was treating a patient with a complex orthopedic condition. The patient had a severely damaged knee joint that required a custom - made knee implant.
Traditional Implant Manufacturing:
Traditionally, knee implants are mass - produced in standard sizes. Surgeons would then select the implant that best fit the patient's anatomy, but it often required additional bone - cutting and adjustments during the surgery to ensure a proper fit. The cost of a standard knee implant was around \(3000, and the overall cost of the surgery, including the implant, surgical tools, and hospital stay, was approximately \)20,000. The surgical procedure was complex and carried a higher risk of complications due to the less - than - perfect fit of the implant.
3D Printing for Custom Implants:
City General Hospital decided to use 3D printing to create a custom - made knee implant for the patient. First, a 3D scan of the patient's knee was taken to create a detailed digital model. This model was then used to design a personalized knee implant that perfectly matched the patient's unique anatomy. The implant was printed using a biocompatible metal powder on a DMLS 3D printer.
Impact on Treatment and Cost:
The 3D - printed implant cost around \(3500, which was slightly higher than the standard implant. However, the overall cost of the surgery was reduced to \)18,000. This was because the custom - fit implant required less bone - cutting and adjustment during the surgery, reducing the surgical time by 30% and the hospital stay by 2 days. The patient also experienced a faster recovery time, returning to normal activities in 6 weeks compared to the usual 8 - 10 weeks for a standard implant. The treatment outcome was significantly better, with the patient reporting less pain and a higher range of motion in the knee.
Conclusion
In Yigu Technology conclusion, 3D printing services have emerged as a game - changer in unlocking additive manufacturing for projects across a wide spectrum of industries. Through the exploration of the mechanics, types of technologies, material options, design considerations, cost - effectiveness, and real - world applications, it is evident that 3D printing offers numerous advantages over traditional manufacturing methods.
The ability to create complex geometries, achieve high precision, and produce customized parts with relative ease makes 3D printing an attractive option for product development, prototyping, and even small - to - medium - scale production. The diverse range of 3D printing technologies, such as FDM, SLA, SLS, and DMLS, each with their own unique strengths and weaknesses, allows businesses and individuals to select the most suitable technology for their specific project requirements.
The case studies presented, from the automotive, healthcare, and aerospace industries, clearly demonstrate the tangible benefits of 3D printing in terms of cost reduction, performance improvement, and time - to - market acceleration. These real - world examples serve as powerful testimonials to the transformative potential of 3D printing services.
FAQ
- What is the most cost - effective 3D printing technology for small - scale prototyping?
FDM (Fused Deposition Modeling) is often the most cost - effective for small - scale prototyping. It has relatively inexpensive equipment and materials, with desktop FDM printers available for a few hundred dollars and filaments costing around \(20 - \)50 per kilogram.
- Can 3D printing be used for large - scale production?
While 3D printing is more commonly associated with prototyping and small - batch production, some technologies like SLS and DMLS are being increasingly used for large - scale production, especially in industries like aerospace and automotive. However, factors such as cost, speed, and material limitations still need to be carefully considered.
- What are the main challenges in using 3D printing for medical applications?
The main challenges include ensuring the biocompatibility and long - term stability of 3D - printed materials, meeting strict regulatory requirements, and the high cost of both the equipment and the specialized materials used in medical 3D printing.
