What is Bubble Injection Molding
Definition and Basic Concept
Bubble Injection Molding, also known as Foam Injection Molding (FIM), is a specialized manufacturing process within the realm of plastic injection molding. It revolutionizes traditional injection molding by introducing the formation of a foam - like structure within the plastic part during the molding process.
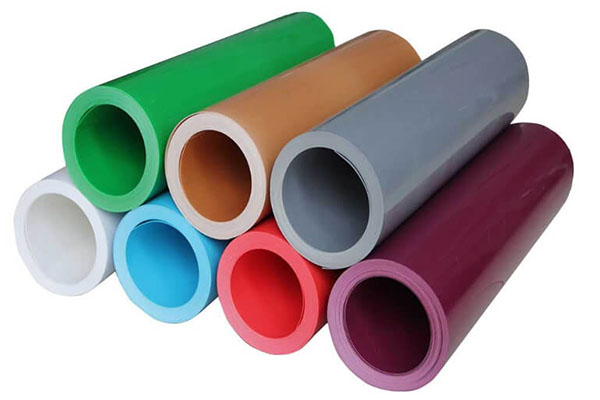
The fundamental principle behind Bubble Injection Molding lies in the use of a foaming agent. There are two main types of foaming agents: chemical and physical. Chemical foaming agents decompose when heated, releasing gases such as carbon dioxide or nitrogen, which create bubbles within the molten plastic. Physical foaming agents, on the other hand, are typically gases like supercritical carbon dioxide or nitrogen that are dissolved into the molten plastic under high pressure. When the pressure is reduced, these gases come out of solution, forming bubbles. As a result, the plastic material expands, creating a cellular or foamy structure. This foam structure offers several advantages, such as reduced weight, improved insulation properties, and enhanced impact resistance compared to solid plastic parts.
Key Components and Working Process
- Key Components:
- Injection Machine: The workhorse of the process, it is responsible for melting the plastic resin and injecting it into the mold. High - pressure injection is crucial to ensure the plastic fills the mold cavity completely, even when dealing with the foaming process. For example, a modern injection machine can generate injection pressures ranging from 500 to 3000 bar, depending on the complexity of the part and the plastic material used.
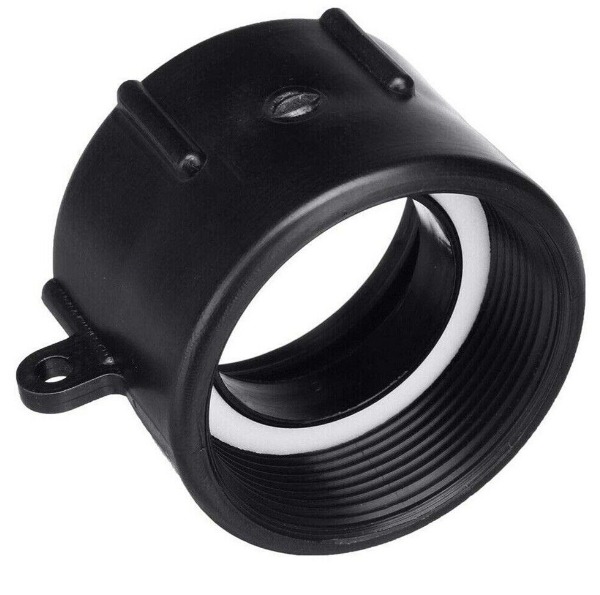
- Mold: Specifically designed to accommodate the foaming process. It must be able to withstand the pressure changes during injection and the expansion of the plastic due to foaming. Molds are often made of high - strength steel alloys, such as P20 or H13 steel, which can endure the mechanical stresses and thermal cycling associated with the process.
- Foaming Agent Delivery System: Whether it's a chemical foaming agent dispenser or a physical gas injection system, this component is essential for introducing the foaming agent into the molten plastic. In the case of physical foaming agents, precise control of gas injection pressure and flow rate is required. For instance, when using supercritical carbon dioxide, the injection pressure may be maintained between 100 and 300 bar to ensure proper dissolution in the plastic melt.
- Working Process:
- Material Preparation: Plastic pellets are first loaded into the hopper of the injection machine. These pellets are then conveyed into the heating barrel, where they are melted by a combination of electrical heaters and the mechanical shear generated by a rotating screw. At the same time, the foaming agent is prepared. If it's a chemical foaming agent, it may be pre - blended with the plastic pellets or added directly into the melting barrel at a specific stage. For physical foaming agents, the gas is pressurized and made ready for injection into the molten plastic.
- Injection and Foaming: The molten plastic, now mixed with the foaming agent, is forced through a nozzle into the closed mold cavity. As the plastic enters the mold, the pressure drop causes the foaming agent to react. If it's a chemical foaming agent, the decomposition reaction occurs, releasing gases that form bubbles. In the case of physical foaming agents, the dissolved gas comes out of solution, creating a multitude of tiny bubbles. This causes the plastic to expand and fill the mold cavity in a foamed state.
- Cooling and Solidification: Once the mold cavity is filled with the foamed plastic, the mold is cooled. This can be achieved through water - cooled channels built into the mold. As the plastic cools, the bubbles are locked in place, and the plastic solidifies, taking on the shape of the mold cavity. The cooling time is a critical factor, as it affects the final quality of the part. Shorter cooling times can lead to incomplete solidification and dimensional instability, while longer cooling times can reduce production efficiency.
- Ejection: After the plastic part has cooled and solidified sufficiently, the mold opens, and the part is ejected using ejector pins. The finished foamed plastic part is then removed from the mold, ready for post - processing such as trimming, sanding, or painting, depending on the requirements.
The Significance of Bubble Injection Molding
Applications in Various Industries
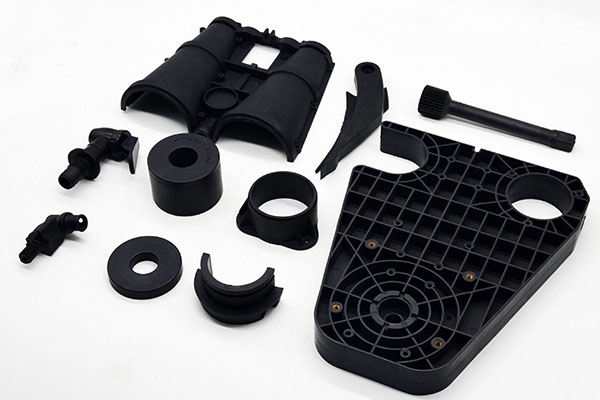
- Automotive Industry: In the automotive sector, Bubble Injection Molding is widely used for manufacturing interior components such as dashboards, door panels, and seat backs. For example, the dashboard of many modern cars is made using this technology. The foam - like structure provides excellent vibration - damping properties, reducing the noise and vibrations transferred from the engine and road to the cabin. It also helps in weight reduction, which in turn improves fuel efficiency. A study by a leading automotive manufacturer found that by using Bubble Injection Molding for door panels, they were able to reduce the weight of the component by up to 30% while maintaining the required strength and stiffness.
- Electronics Industry: In the production of electronic devices, Bubble Injection Molding is employed for creating housings for laptops, tablets, and mobile phones. The lightweight nature of the foamed plastic is highly beneficial as it allows for the development of more portable and sleek devices. Additionally, the improved insulation properties of the foam can help in protecting the sensitive electronic components from heat and electromagnetic interference. For instance, some high - end laptop manufacturers use foamed plastic made through Bubble Injection Molding for their laptop chassis, which not only reduces the weight but also provides better heat dissipation, enhancing the overall performance and lifespan of the device.
- Packaging Industry: Bubble Injection Molding has made a significant impact on the packaging industry. It is used to produce packaging materials for delicate products such as glassware, electronics, and food items. The cushioning effect of the foamed plastic provides excellent protection during transportation and storage. For example, the packaging for high - end wine bottles often utilizes foamed plastic inserts made through this process. These inserts can effectively absorb shocks and prevent the bottles from breaking. Moreover, the reduced weight of the packaging materials helps in reducing transportation costs, making it an economically viable option for businesses.
Advantages over Traditional Injection Molding
| Comparison Aspect | Traditional Injection Molding | Bubble Injection Molding |
| Weight | Produces solid plastic parts, resulting in relatively heavy components. For a typical plastic part used in automotive interior, it might weigh around 1 kg. | Creates parts with a foamed structure, significantly reducing weight. The same automotive interior part made with Bubble Injection Molding could weigh as little as 0.7 kg, a reduction of about 30%. |
| Cost | Higher material costs due to the use of more plastic. Also, longer cooling times can increase energy consumption and production time, adding to the overall cost. | Lower material usage due to the foaming process. The reduced cooling time (up to 20 - 30% reduction in some cases) also leads to lower energy costs and higher production efficiency, resulting in overall cost savings. |
| Performance | Solid plastic parts may have limitations in terms of insulation and impact resistance. | Offers improved insulation properties, making it suitable for applications where temperature control is crucial. The foamed structure also enhances impact resistance, protecting the contents or components within the molded part. |
| Environmental Impact | Higher material consumption means more plastic waste. | Lower material usage contributes to less plastic waste generation, making it a more environmentally friendly option. |
Common Issues in Bubble Injection Molding and How to Prevent Them
Defects Caused by Bubbles
- Surface Defects: Bubbles can lead to a variety of surface imperfections in the molded parts. One common issue is the presence of surface pits or voids. When bubbles reach the surface of the plastic during the molding process, they can cause small depressions, which not only affect the aesthetic appearance of the part but also may lead to problems in subsequent finishing operations such as painting or plating. For example, in the production of plastic housings for consumer electronics, surface pits caused by bubbles can make the product look unappealing and may reduce its marketability. Another surface defect is the formation of a rough surface texture. Uneven bubble distribution near the surface can result in an irregular surface finish, making the part feel rough to the touch. This is particularly problematic for products where a smooth surface is desired, such as in the case of high - end automotive interior components.
- Strength and Structural Integrity: The presence of bubbles can significantly reduce the mechanical strength of the molded parts. Bubbles act as stress concentrators within the plastic matrix. Under mechanical loading, these areas around the bubbles are more likely to experience higher stress levels, which can lead to premature failure of the part. For instance, in the manufacturing of plastic structural components for the automotive or aerospace industries, a reduction in strength due to bubbles can pose a serious safety risk. The impact resistance of the part is also compromised. Instead of being able to absorb and distribute impact energy effectively, the bubbles can cause the plastic to crack or break more easily when subjected to an impact, reducing the part's ability to protect the components it encases.
Preventive Measures
- Material Selection:
- Drying the Plastic Resin: Moisture in the plastic resin is a common source of bubbles. Before processing, the plastic pellets should be dried thoroughly. For example, for hygroscopic plastics like nylon, the moisture content should be reduced to less than 0.1%. Using a desiccant dryer can effectively remove moisture. The drying time and temperature vary depending on the type of plastic. Nylon may require drying at around 80 - 100°C for 4 - 6 hours.
- Choosing the Right Foaming Agent: The type and quality of the foaming agent play a crucial role. Chemical foaming agents should have a consistent decomposition temperature range. For example, if the decomposition temperature is too broad, it can lead to uneven bubble formation. Physical foaming agents, such as supercritical carbon dioxide or nitrogen, need to be of high purity. Impurities in the gas can affect the foaming process and lead to bubble - related defects.
- Process Parameter Adjustment:
- Injection Pressure and Speed: Optimizing the injection pressure and speed is essential. If the injection speed is too high, it can cause turbulence in the molten plastic, trapping air and forming bubbles. On the other hand, if the injection pressure is too low, the plastic may not fill the mold cavity completely, resulting in voids. A general guideline is to start with a moderate injection speed, typically in the range of 30 - 70% of the maximum injection speed of the machine, and adjust based on the part's geometry and the plastic material used. The injection pressure should be set to ensure complete filling of the mold cavity without over - packing the part. For a medium - sized plastic part, the injection pressure may range from 800 to 1500 bar.
- Melt Temperature: The melt temperature of the plastic affects the solubility of the foaming agent and the viscosity of the plastic. If the melt temperature is too low, the foaming agent may not dissolve properly, leading to large or unevenly sized bubbles. If it's too high, the plastic may degrade, also causing defects. For polyethylene, the typical melt temperature range for bubble injection molding is 180 - 230°C.
- Cooling Rate: A proper cooling rate is necessary to lock the bubbles in place and prevent them from coalescing or collapsing. Cooling too quickly can cause internal stresses and lead to part warping, while cooling too slowly can result in large, unstable bubbles. Using a water - cooled mold, the water temperature can be adjusted between 20 - 50°C depending on the plastic material and part thickness.
- Mold Design Optimization:
- Ventilation Design: Proper mold ventilation is crucial to allow the escape of air and gases generated during the foaming process. Vent holes or channels should be strategically placed in the mold. For example, in areas where the plastic flow converges or in thick - walled sections of the part. The size of the vent holes should be carefully designed to prevent plastic leakage while allowing efficient gas escape. A typical vent hole diameter can be in the range of 0.05 - 0.2 mm.
- Runner and Gate Design: The runner system, which channels the molten plastic from the injection nozzle to the mold cavity, and the gate, where the plastic enters the cavity, should be designed to promote smooth and even plastic flow. A well - designed runner and gate can reduce the formation of turbulence and air entrapment. For instance, using a balanced runner system can ensure that the plastic reaches all parts of the mold cavity at the same time, minimizing the chances of bubble formation due to uneven flow.
Yigu Technology's Perspective
As a non - standard plastic metal products custom supplier, Yigu Technology highly values the potential of Bubble Injection Molding. We recognize that this innovative process can bring about significant improvements in the quality and performance of our custom - made products.
In our experience, the weight - reduction advantage of Bubble Injection Molding is a game - changer, especially when manufacturing products that require portability without sacrificing strength. For example, in some custom - designed electronic enclosures, the use of foamed plastic made through this process has not only reduced the overall weight but also enhanced the product's heat - dissipation capabilities.
We also understand the importance of preventing defects in Bubble Injection Molding. Our team of experts is well - versed in material selection, process parameter adjustment, and mold design optimization. By implementing strict quality - control measures at every stage of production, we ensure that the final products meet the highest standards. Yigu Technology is committed to leveraging Bubble Injection Molding to drive innovation in non - standard plastic metal products, providing our customers with more efficient, high - quality, and cost - effective solutions.
FAQ about Bubble Injection Molding
What are the main types of foaming agents used in bubble injection molding?
The main types of foaming agents are chemical and physical ones. Chemical foaming agents, such as azodicarbonamide (AC) and azobisisobutyronitrile (AIBN), decompose when heated, releasing gases like carbon dioxide or nitrogen to create bubbles. They are often pre - blended with plastic pellets. Physical foaming agents, like supercritical carbon dioxide or nitrogen, are dissolved into the molten plastic under high pressure. When the pressure is reduced, they form bubbles. Physical foaming agents are more environmentally friendly and can offer better control over bubble size and distribution.
How does the temperature affect the bubble formation in the process?
Temperature plays a crucial role. A higher melt temperature generally makes it easier for the foaming agent to dissolve in the plastic melt and for the bubbles to grow. However, if the temperature is too high, it can cause the bubbles to coalesce (merge together), resulting in uneven bubble distribution and potentially larger, unstable bubbles. On the other hand, if the temperature is too low, the foaming agent may not decompose properly (in the case of chemical foaming agents) or come out of solution evenly (for physical foaming agents), leading to poor bubble formation and a less - than - optimal foamed structure. For example, for a polyethylene - based bubble injection molding process, a melt temperature that is 10 - 20°C above the normal processing temperature might lead to larger and more irregularly sized bubbles.
Can bubble injection molding be used for all types of plastics?
No, it cannot be used for all plastics. Crystalline plastics like polyethylene (PE) and polypropylene (PP) are well - suited for bubble injection molding. Their molecular structure allows for relatively easy incorporation and growth of bubbles during the molding process, resulting in a stable foamed structure. Amorphous plastics such as polystyrene (PS) and polycarbonate (PC) can also be processed using this method, but they may require more precise control of process parameters due to their different melting and flow characteristics. However, some high - performance engineering plastics with very high melting points or complex molecular structures may not be suitable. For instance, some polyimides are difficult to process with bubble injection molding because their high melting temperatures can cause the foaming agent to decompose prematurely or the plastic to degrade before proper foaming can occur.