What is Injection Moulding?
Injection moulding is a manufacturing process that has revolutionized the production of plastic products. At its core, it involves the transformation of raw plastic materials into a wide variety of shapes and forms with high precision and efficiency.
The basic principle is straightforward yet ingenious. First, granular plastic resin is fed into a heated barrel. As it travels through the barrel, it is gradually softened and melted by the heat, reaching a highly malleable state. This melted plastic, now in a viscous liquid form, is then forcefully injected under high pressure into a carefully designed metal mold. The mold, which is typically made up of two halves, has a cavity that is precisely shaped according to the desired final product. Once the molten plastic fills every nook and cranny of the mold cavity, it begins to cool and solidify rapidly due to the relatively lower temperature of the mold. This cooling process is carefully regulated to ensure uniform solidification and dimensional stability. Once the plastic has fully hardened, the mold opens, and the newly formed plastic part, now a replica of the mold cavity, is ejected. This cycle of feeding, melting, injecting, cooling, and ejecting is repeated continuously, enabling high - volume production.
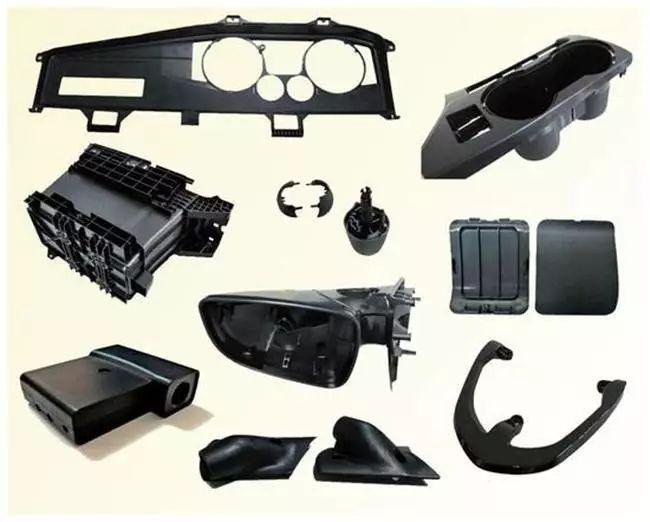
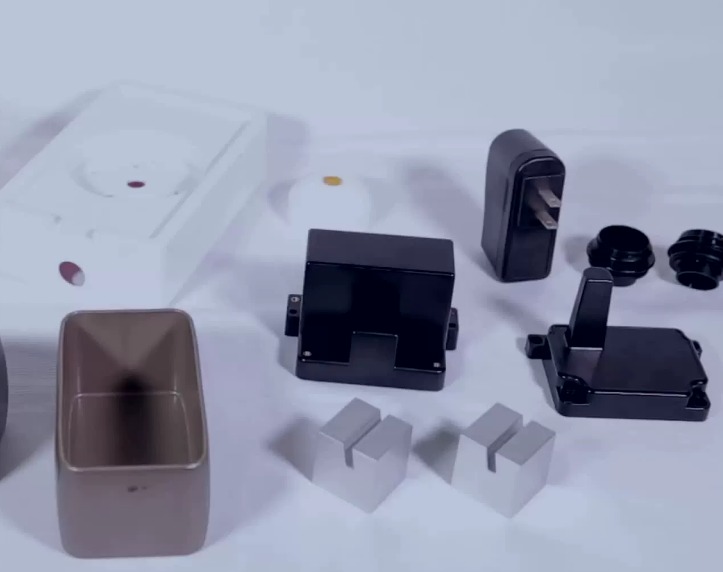
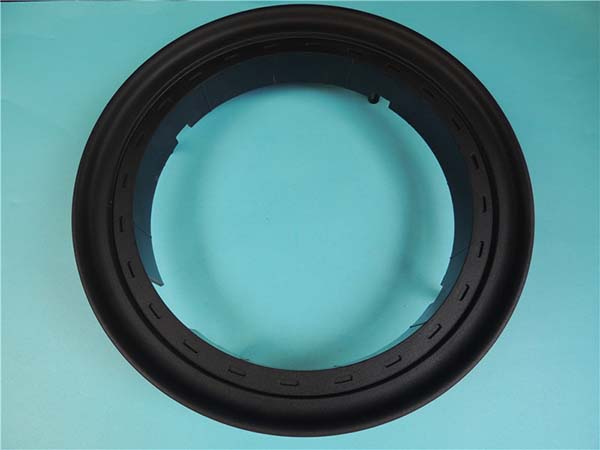
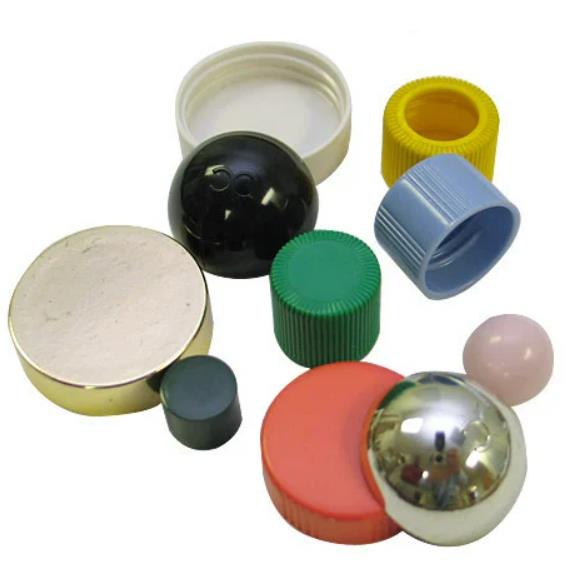
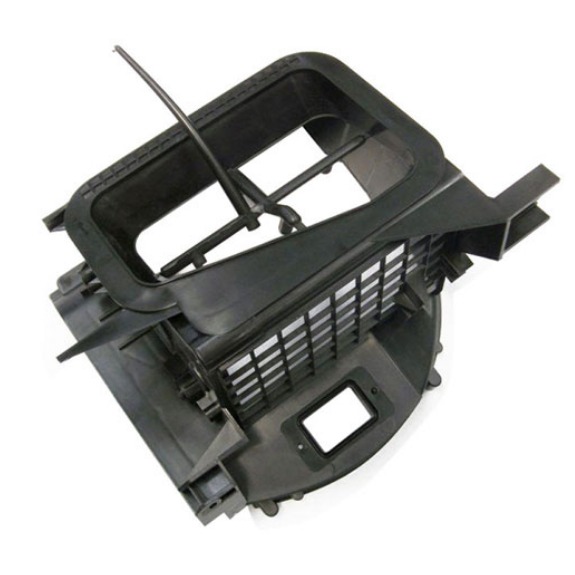
For Yigu Technology example, think about the plastic water bottles we use daily. These bottles are produced through injection moulding. The bottle's shape, from its cylindrical body to the threaded neck, is created by injecting molten plastic into a mold with the exact negative shape of the bottle. Another common example is the plastic toy figurines. Each intricate detail, from the facial features to the smallest accessories on the figurine, can be accurately replicated through this process. Injection moulding is so versatile that it can produce anything from tiny electronic components to large automotive parts, making it an indispensable process in modern manufacturing.
Key Steps in the Injection Moulding Process
The injection moulding process is a complex and highly precise operation, consisting of several key steps that are crucial for producing high - quality plastic products. Each step is carefully controlled to ensure the final product meets the desired specifications.
1. Material Preparation
Before the injection moulding process begins, the plastic material, usually in the form of small pellets, needs to be properly prepared. One of the most important aspects of material preparation is drying. Many types of plastics, such as nylon and polycarbonate, are hygroscopic, which means they absorb moisture from the air. If this moisture is not removed, it can cause serious problems during the moulding process. For Yigu Technology example, when the moist plastic is melted and injected into the mold, the water vaporizes. This can lead to the formation of voids, bubbles, or surface defects in the final product. To prevent this, the plastic pellets are typically dried in a specialized drying oven. The drying time and temperature vary depending on the type of plastic. For instance, nylon may need to be dried at around 80 - 110°C for 4 - 8 hours, while polycarbonate might require drying at 120 - 130°C for 3 - 5 hours. Additionally, some plastic materials may need to be blended with additives such as colorants, stabilizers, or reinforcing agents at this stage to achieve the desired properties in the final product.
2. Melting the Plastic
Once the plastic is properly prepared, it is fed into the injection molding machine's hopper, which then delivers it to the heated barrel. The barrel is equipped with heating elements, usually in the form of electrical resistance heaters, that gradually raise the temperature of the plastic as it moves along the barrel. As the plastic moves through the barrel, a rotating screw plays a vital role. The screw not only conveys the plastic forward but also compresses and mixes it. This mechanical action, combined with the heat from the heating elements, softens and melts the plastic, transforming it from solid pellets into a highly viscous, molten state. The temperature of the barrel is carefully controlled in multiple zones. The rear of the barrel, where the plastic pellets enter, is typically set at a lower temperature to prevent premature melting and ensure smooth feeding. As the plastic progresses towards the front of the barrel, closer to the mold, the temperature is gradually increased to fully melt the plastic and ensure it has the right viscosity for injection. For example, for polyethylene, the temperature in the rear zone might be around 150 - 180°C, while in the front zone, it could be 200 - 230°C.
3. Injection into the Mold
When the plastic has reached the appropriate molten state, it's time for injection. The injection process is where the magic really happens. The rotating screw, which has been compressing the molten plastic, now acts as a piston. It exerts a high - pressure force on the molten plastic, forcing it through a nozzle and into the mold cavity. The pressure and speed of injection are critical parameters that need to be carefully controlled. High injection pressure is necessary to ensure that the molten plastic fills every intricate detail of the mold cavity, especially in cases where the mold has complex geometries or thin - walled sections. However, if the pressure is too high, it can cause problems such as flash (excess plastic squeezing out between the mold halves), short shots (incomplete filling of the mold), or excessive stress on the mold. On the other hand, injection speed affects how quickly the mold is filled. A slow injection speed may lead to premature solidification of the plastic in the mold runners or cavities, resulting in an incomplete part. In contrast, a too - fast injection speed can cause air entrapment, leading to voids or surface blemishes in the final product. For a typical small - to - medium - sized plastic part, the injection pressure might range from 50 - 150 MPa, and the injection speed could be around 50 - 150 mm/s.
4. Cooling and Solidification
Once the mold cavity is filled with the molten plastic, the cooling process begins. This is a crucial stage as it determines the final shape, dimensional stability, and mechanical properties of the product. The mold is equipped with a cooling system, usually consisting of channels through which a coolant, such as water or a water - glycol mixture, circulates. The coolant absorbs the heat from the molten plastic, causing it to cool and solidify. The cooling time is a critical factor. If the cooling time is too short, the plastic may not have sufficient time to solidify properly. This can result in a part that is still soft or has internal stresses, leading to warping, shrinkage, or even cracking after ejection. Conversely, if the cooling time is too long, it can reduce the production efficiency and increase costs. The cooling time depends on various factors, including the type of plastic, the thickness of the part, and the design of the cooling system. For example, a thin - walled polyethylene part might have a cooling time of 10 - 20 seconds, while a thick - walled polypropylene part could require 30 - 60 seconds or more to cool and solidify properly.
5. Ejection of the Finished Product
After the plastic has cooled and solidified to the point where it can maintain its shape, the mold opens, and the finished product needs to be removed. This is accomplished through an ejection system. The ejection system typically consists of ejector pins, which are small rods located within the mold. When the mold opens, the ejector pins are activated, usually by a mechanical or hydraulic mechanism. The ejector pins push against the part, forcing it out of the mold cavity. To ensure smooth ejection without damaging the part, the surface of the mold cavity may be treated with a release agent, and the ejector pins are carefully positioned to distribute the ejection force evenly across the part. In some cases, especially for parts with complex shapes or undercuts (areas where the part would otherwise be trapped in the mold), additional mechanisms such as lifters or slides may be used in combination with the ejector pins to facilitate the removal of the part. Once the part is ejected, it is either collected manually or by an automated system for further processing, such as trimming, finishing, or quality inspection.
Overview of Injection Moulding Process
Introduction
Injection moulding is a widely used manufacturing process that involves injecting molten material into a mould to create plastic components. This technique has gained significant traction due to its precision, repeatability, and high efficiency. It is employed across various industries, including automotive, medical devices, consumer goods, and electronics, among others.
Importance
In today’s rapidly industrialising world, injection moulding offers an effective solution for producing high-quality plastic parts with minimal waste. The flexibility to tailor the process to meet the specific needs of different industries makes it one of the most adaptable manufacturing techniques available.
Advantages
Injection moulding offers numerous advantages. First, it allows for the creation of intricate and complex geometric shapes that would be challenging or prohibitively expensive to produce with other methods. Second, because molten plastic is injected into a closed mould under pressure, material waste is significantly reduced compared to other forming processes, such as CNC machining or 3D printing. Third, the automation of several stages, including part ejection, reduces labour costs, making the process economically viable even for small-scale production runs.
Overall, injection moulding provides manufacturers with the flexibility to produce both simple and complex designs while maintaining high-quality standards, thereby improving both profitability and customer satisfaction.
Advantages and Disadvantages of Injection Moulding
Injection moulding, like any manufacturing process, has its own set of advantages and disadvantages. Understanding these can help manufacturers make informed decisions about whether this process is suitable for their product and production requirements.
A comparison table of the advantages and disadvantages of injection moulding is as follows:
| Aspect | Advantage | Disadvantage |
| Production Efficiency | Fast cycle times and high - volume production; highly automated | |
| Dimensional Accuracy | Tight tolerances and high repeatability | |
| Product Design | Can create complex geometries and allows for customization | |
| Material Compatibility | Works with a wide range of plastics and some recyclability | Limited options for certain metals, ceramics, and high - performance applications |
| Cost | High initial tooling costs (mold manufacturing and development) | |
| Environment | Plastic waste generation and high energy consumption |
Material Selection for Injection Moulding
Choosing the right material for injection moulding is crucial for the success of the production process. The selection depends on various factors, including mechanical properties, chemical resistance, cost, availability, and recyclability.
Commonly used materials include thermoplastics like polyethylene (PE), polystyrene (PS), polypropylene (PP), and acrylonitrile butadiene styrene (ABS), as well as engineering plastics like polycarbonate (PC) and nylon. Each material offers specific benefits: for instance, polyethylene is known for its chemical resistance and affordability, while polycarbonate is valued for its strength and durability, making it ideal for automotive and electronic applications.
In some cases, high-performance materials, such as PEEK or PTFE, may be required for applications involving high temperatures or chemical exposure. The selection process should also consider the supplier’s capabilities and the potential risks of supply chain disruptions, especially in light of recent global events such as the COVID-19 pandemic.
In conclusion, material selection is a critical step in injection moulding, especially for parts used in demanding applications. By carefully considering the properties of each material and working closely with suppliers, manufacturers can ensure that the final product meets the highest standards of quality and performance.
Design for Injection Moulding
Injection moulding is a versatile and efficient manufacturing process that allows for the production of high-quality plastic components with precision. However, to ensure optimal results and minimize defects, parts must be carefully designed for injection moulding. In this section, we discuss key design guidelines, considerations for mould and tooling, and the use of simulation to improve the design process.
Design Guidelines for Injection Moulding
Effective part design for injection moulding requires an understanding of material properties, geometry, and manufacturing limitations. The following key guidelines can help designers achieve optimal results:
- Material Selection: The choice of material impacts the flow, strength, and overall quality of the final part. It's essential to select materials that can withstand the injection moulding process without degrading, and that meet the desired mechanical and physical properties of the part.
- Wall Thickness: Consistency in wall thickness is critical. Parts with uniform thickness fill more easily and uniformly during injection. Variations in thickness can lead to issues like warpage, sink marks, and poor surface quality. Designers should avoid thick sections and ensure the wall thickness is consistent, typically ranging between 1.5 mm to 3 mm.
- Draft Angles: To ease the ejection of parts from the mould, draft angles should be incorporated into the design. Typically, draft angles of 1 to 2 degrees per side are sufficient to ensure smooth removal without damaging the part.
- Avoiding Undercuts: Undercuts are features that interfere with the mould opening. While they can be used, they complicate mould design and may require additional tools like sliders or lifters, increasing the complexity and cost of the mould. If undercuts are unavoidable, consider designing for easy removal or using multi-part moulds.
- Sharp Corners: Sharp corners can lead to stress concentration, which may result in cracks or defects. Designers should include radii in corners and edges to reduce stress and improve the part’s structural integrity.
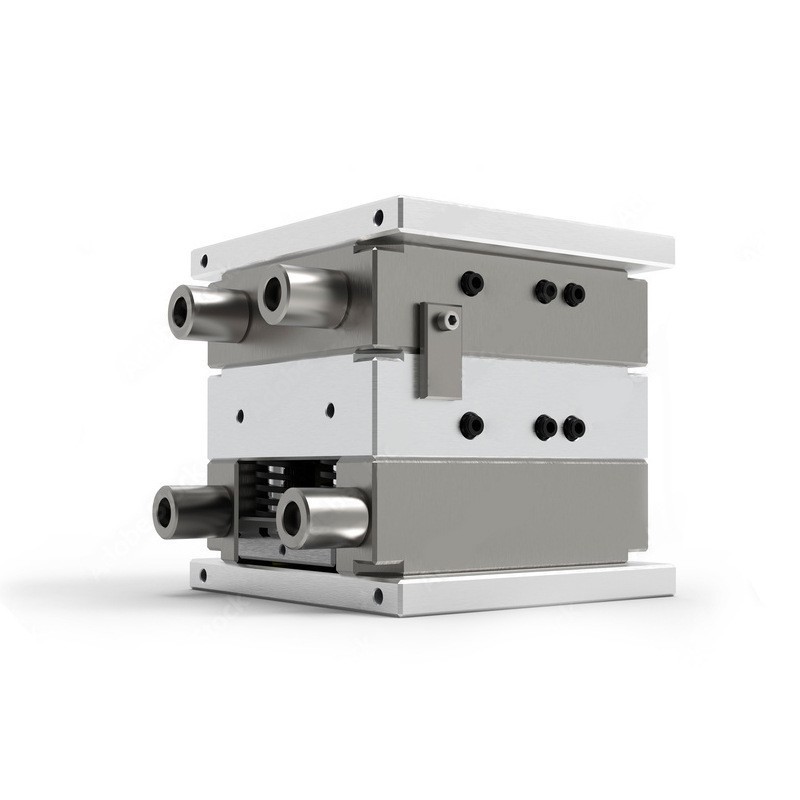
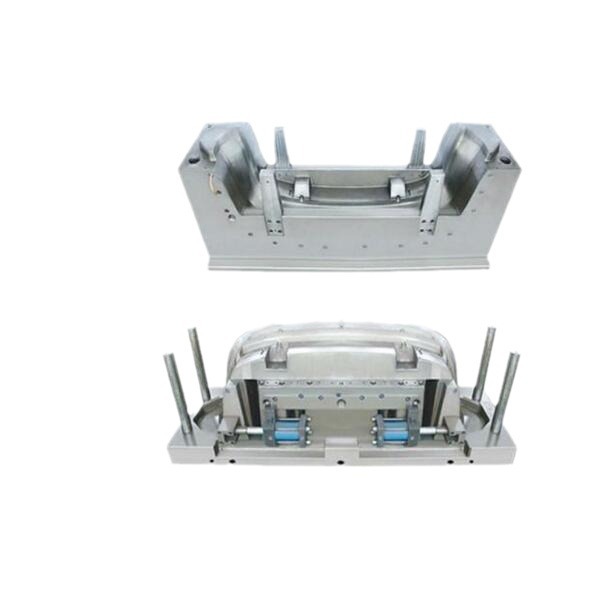
Mold and Tooling Design
Mould and tooling design are fundamental to the success of injection moulding. A well-designed mould ensures efficient production, minimizes defects, and reduces overall costs. Below are some critical aspects of mould and tooling design:
- Gating System: The gating system determines how molten plastic enters the mould. The position and design of the gates (e.g., edge gate, pin gate, hot runner) impact part quality and cycle time. Engineers use simulation tools like Autodesk Moldflow Insight to perform gate location analysis for optimal part filling.
- Runner Design: The runner system connects the gates to the mould cavity. Proper runner design ensures even flow of material to all parts of the mould. It minimizes material waste and optimizes cycle time.
- Cavity Layout: The cavity layout should be carefully planned to ensure uniform distribution of plastic and to avoid issues such as warping or voids. A balanced cavity system ensures uniform pressure and material flow.
- Core and Cavity Block Assembly: The core and cavity blocks must be designed and machined accurately to meet part specifications. Proper assembly and alignment of these blocks are essential for preventing defects and ensuring high-quality output.
- Mould Polishing and Assembly: Mould polishing helps achieve a smooth finish on the part surface, improving aesthetics and reducing defects. After machining the components, the final mould assembly is tested to ensure proper function.
Injection Moulding Simulation
Simulation tools have become essential in the injection moulding process, enabling engineers to predict how molten plastic behaves during filling, packing, cooling, and ejection. By using simulation software like Autodesk Moldflow Insight, designers can identify potential issues early in the design process and optimize mould performance before physical prototypes are made. Some key advantages of using simulation are:
- Filling and Packing Analysis: Simulation allows designers to visualize how the molten plastic fills the mould cavity, and it helps in identifying areas that may experience incomplete filling, air traps, or short shots.
- Cooling Analysis: Simulation tools help predict cooling times and temperature distribution within the mould, optimizing cooling channels to ensure uniform part cooling and minimize cycle times.
- Warpage Prediction: Simulation tools can predict part warpage due to material shrinkage during cooling, helping designers identify problem areas and adjust the design for better dimensional stability.
- Material Flow Optimization: The software can suggest optimal gate and runner designs to ensure that the material flows uniformly into the mould cavity, reducing waste and improving part quality.
Process Variables in Injection Moulding
The injection moulding process involves several critical variables that need to be closely monitored and controlled to produce high-quality parts. These include:
- Temperature Control: Precise temperature control is essential to maintain the flow characteristics of the molten material. Proper barrel, mould, and melt temperatures prevent defects like burning or degradation of the material.
- Pressure Control: Pressure during injection and packing is critical to part quality. High pressure ensures that the mould cavity is completely filled, while proper packing pressure ensures the part is fully compacted and free from voids.
- Injection Speed: Injection speed affects the flow of material into the mould. A slower injection speed can reduce the risk of air entrapment and improve surface finish, whereas faster speeds may reduce cycle times.
- Cooling Time: Cooling time is essential for ensuring proper solidification of the material. It directly impacts the cycle time and part quality. Insufficient cooling can result in warping, shrinkage, or other dimensional defects.
- Drying and Moisture Control: Some materials, such as nylon or PET, are hygroscopic and absorb moisture from the air. Excess moisture can degrade the material and lead to defects like bubbles or poor mechanical properties. Drying the material before processing is essential to avoid these issues.
Quality Control and Assurance in Injection Moulding
Ensuring product quality is a primary concern in injection moulding. Both quality control and quality assurance processes are essential for delivering consistent, high-quality parts. The following strategies are commonly used in the industry:
- Visual Inspection: A common method for detecting defects such as cracks, discoloration, or surface imperfections. Regular visual inspection helps catch issues early.
- Dimensional Analysis: Measurements of critical dimensions are taken during production to ensure parts conform to the design specifications. High-precision tools such as coordinate measuring machines (CMM) are often used.
- Statistical Process Control (SPC): This approach uses statistical methods to monitor and control the process. SPC tracks key performance indicators, such as cycle time and defect rate, to identify potential problems and take corrective actions proactively.
- Material Testing: Tests like tensile strength, impact resistance, and chemical resistance are conducted to ensure the material meets performance standards.
- Quality Assurance Certifications: Achieving certifications such as ISO 9001 ensures that manufacturers are adhering to internationally recognized quality management standards. Certification audits help identify areas for improvement and maintain high levels of quality control.
Conclusion
Injection moulding is a highly efficient and versatile process that can produce complex parts with great accuracy. However, to achieve the desired results, it is essential to follow proper design guidelines, optimize mould and tooling design, use simulation tools to predict material behavior, and monitor critical process variables. Quality control and assurance are fundamental to ensure that parts meet specifications and customer expectations. With advancements in automation and digitalization, the injection moulding process continues to evolve, offering increased productivity, precision, and sustainability.
Yigu Technology's Perspective
As a non - standard plastic metal products custom Supplier, Yigu Technology deeply understands the significance of the injection moulding process. With years of experience in custom production, we've harnessed the power of injection moulding to create a wide range of unique products. Our advanced technology allows us to precisely control every step, from material selection to the final ejection. We can handle complex designs with ease, meeting the diverse needs of our clients. Whether it's a small - batch production for a niche product or a large - scale order, our expertise in injection moulding ensures high - quality, customized results every time.
FAQ about Injection Moulding Process
1. What types of plastics are suitable for injection moulding?
Many types of plastics are suitable for injection moulding. Common ones include:
- Polyethylene (PE): It has good chemical stability, water resistance, and electrical insulation. Low - density polyethylene (LDPE) is soft and flexible, often used for packaging like plastic bags and films. High - density polyethylene (HDPE) is more rigid and is used for products such as plastic containers and pipes.
- Polypropylene (PP): It is lightweight, has high strength, good heat resistance, and excellent chemical stability. PP is commonly used in products like microwave - safe food containers and automotive parts.
- Acrylonitrile Butadiene Styrene (ABS): ABS combines the properties of its monomers. It has high strength, good impact resistance, and is easy to process. It is widely used in the electronics industry for making device casings, such as those for TVs, computers, and mobile phones.
- Polycarbonate (PC): PC offers high transparency, high strength, and good heat resistance. It is used in applications like optical lenses, safety helmets, and automotive headlight covers.
2. What is the typical lifespan of an injection mould?
The typical lifespan of an injection mold can vary widely. On average, a well - maintained mold made from high - quality materials can produce anywhere from 500,000 to 1 million parts. However, several factors can affect its lifespan:
- Mold Material: High - quality steel molds generally have a longer lifespan than those made from aluminum. For example, molds made from premium tool steels can withstand more cycles before showing signs of wear.
- Injection Material: Abrasive or corrosive plastics can wear down the mold faster. For instance, filled plastics with glass fibers can cause more abrasion on the mold surface.
- Injection Process: Proper control of injection pressure, temperature, and cycle time can extend the mold's life. Over - stressing the mold with excessive pressure can lead to premature wear and damage.
- Maintenance: Regular cleaning, lubrication, and inspection can significantly increase the mold's lifespan. For example, removing residual plastic and debris from the mold after each production run can prevent corrosion and wear.