Understanding the Basics of Plastic Part Costing Sheet
What is a Plastic Part Costing Sheet?
A Plastic Part Costing Sheet is a detailed document that comprehensively lists all the costs associated with manufacturing plastic parts. It serves as a financial blueprint for the entire production process, from the initial raw material procurement to the final product delivery. This sheet breaks down costs into various categories such as raw material costs, labor costs, tooling costs, overhead costs, and more. For example, in the production of a plastic toy, the costing sheet will specify the cost of the plastic pellets used (raw material cost), the wages of the workers involved in injection molding and assembly (labor cost), the expense of creating the mold for the toy (tooling cost), and the Apportionment of factory rent, utilities, and equipment depreciation (overhead cost). In the manufacturing project, this sheet stands at the core, acting as a crucial tool for cost control and project budget planning.
Key Elements of a Plastic Part Costing Sheet
Material Costs
Material costs are a significant component of the total cost in plastic part manufacturing. Different types of plastic materials have varying costs. For example, common plastics like Polyethylene (PE) and Polypropylene (PP) are relatively cost - effective, while engineering plastics such as Polycarbonate (PC) and Acrylonitrile Butadiene Styrene (ABS) are more expensive.
The cost of plastic materials is calculated based on the amount used and the market price. The amount of material required depends on the size, shape, and wall thickness of the plastic part. To accurately calculate the material cost, the formula is: Material Cost = Material Quantity × Material Unit Price. For instance, if a plastic part requires 0.5 kg of a particular plastic material, and the unit price of this material is \(2 per kg, the material cost for this part is \)1.
Market price fluctuations also play a crucial role. The price of plastic materials can be affected by factors such as the price of crude oil (since most plastics are derived from petrochemicals), supply - demand relationships, and global economic conditions. A study shows that in the past five years, the price of some plastic materials has fluctuated by up to 30% due to changes in oil prices and supply chain disruptions. The following table shows the approximate cost range of some common plastic materials per kilogram:
| Plastic Material | Cost per Kilogram ($) |
| Polyethylene (PE) | 1 - 3 |
| Polypropylene (PP) | 1.5 - 3.5 |
| Polycarbonate (PC) | 4 - 8 |
| Acrylonitrile Butadiene Styrene (ABS) | 3 - 6 |
Manufacturing Process Costs
There are several manufacturing processes for plastic parts, with injection molding and blow molding being two of the most common. Each process has its own cost - structure.
Injection Molding:
- Equipment Depreciation: Injection molding machines are expensive. For example, a medium - sized injection molding machine can cost between \(50,000 and \)200,000. The depreciation cost is spread over the machine's lifespan. If a machine costs \(100,000 and has a lifespan of 10 years, the annual depreciation cost is \)10,000.
- Energy Consumption: Injection molding machines consume a significant amount of electricity. On average, a machine might consume 10 - 30 kWh per hour during operation. Considering an electricity cost of \(0.15 per kWh, the energy cost per hour can range from \)1.5 to $4.5.
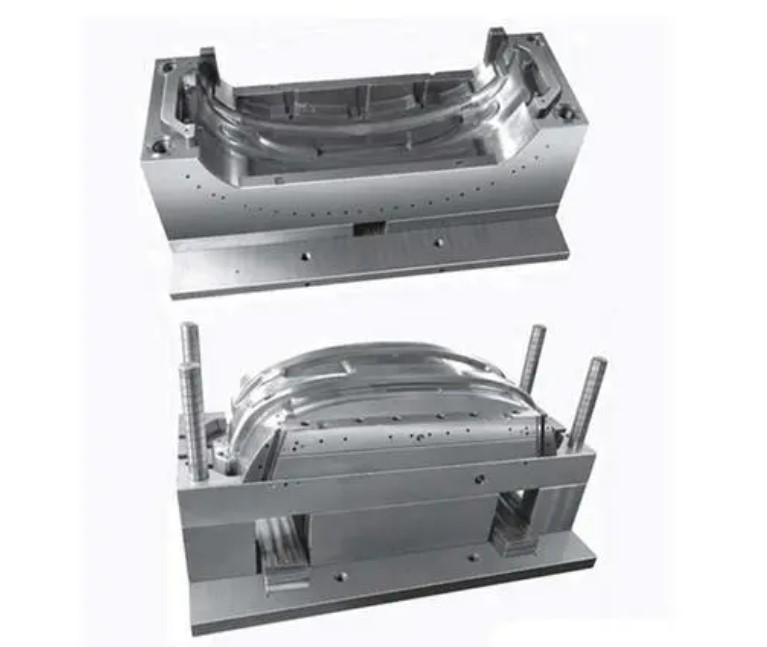
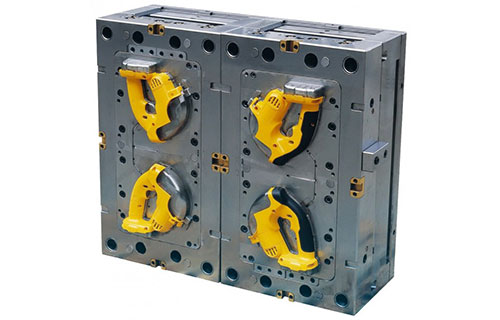
- Mold Costs: Molds for injection molding are custom - made and can be very costly. A simple mold might cost \(5,000, while a complex multi - cavity mold can cost upwards of \)50,000. The cost of the mold is amortized over the number of parts produced. If a mold costs \(10,000 and is expected to produce 100,000 parts, the mold cost per part is \)0.1.
Blow Molding:
- Equipment and Depreciation: Blow molding machines also have a high initial cost, although generally lower than some injection molding machines. A typical blow molding machine might cost between \(30,000 and \)100,000. Using a similar depreciation calculation method as above, if a machine costs \(60,000 and has a lifespan of 8 years, the annual depreciation is \)7,500.
- Energy and Labor: Energy consumption in blow molding is mainly for heating the plastic pre - form. Labor costs are relatively lower compared to injection molding for high - volume production as the process is more automated in some cases. However, the initial setup and mold - changing still require skilled labor.
In general, injection molding is more suitable for complex - shaped parts with high precision requirements, but it has higher upfront costs. Blow molding is often used for hollow products like bottles and containers, and its cost - effectiveness increases with higher production volumes.
Labor Costs
Labor costs include the wages of all employees involved in the production process. This encompasses both direct labor, such as machine operators and assemblers directly involved in manufacturing plastic parts, and indirect labor, like supervisors, quality control inspectors, and maintenance staff who support the production.
The calculation of labor costs is based on the number of workers, their wage rates, and the time they spend on the project. For example, if a production line has 5 machine operators with an hourly wage of \(15 and they work 8 hours a day, the daily labor cost for these operators is \)15×5×8 = $600.
Factors that can affect labor costs include the skill level required for the job, the geographical location of the manufacturing facility (wages can vary significantly between regions), and the production volume. In regions with a high cost of living, such as major cities in developed countries, labor costs can be 2 - 3 times higher than in some developing regions. Also, highly skilled workers, like those who can operate and maintain complex injection molding machines, will command higher wages.
These overhead costs are allocated to each plastic part produced. One common method is to use an overhead rate, which is calculated by dividing the total overhead costs by a cost driver, such as the total number of labor hours or machine hours. For example, if the total overhead costs for a month are \(50,000 and the total labor hours in that month are 2,000 hours, the overhead rate per labor hour is \)25. If a particular plastic part requires 0.5 labor hours to produce, the overhead cost allocated to that part is \(25×0.5 = \)12.5.
Additional Costs (Shipping, Packaging, etc.)
Additional costs such as shipping and packaging also contribute to the total cost of plastic parts.
- Packaging: The cost of packaging materials like plastic bags, boxes, and foam inserts can vary depending on the size and fragility of the plastic part. For small plastic components, the packaging cost per unit might be \(0.1 - \)0.5, while for larger and more delicate parts, it could be \(1 - \)5. High - end products may require more elaborate packaging, increasing the cost further.
- Shipping: Shipping costs depend on the weight, volume, and destination of the shipment. A small batch of lightweight plastic parts shipped domestically might cost \(5 - \)20 per shipment, while international shipping of larger volumes can cost hundreds or even thousands of dollars, especially if they need to be shipped by air.
These additional costs are usually added to the cost of the plastic part on a per - unit basis. They can have a significant impact on the overall cost, especially for long - distance shipments or when high - quality packaging is required. For example, if the shipping cost for a batch of 1,000 plastic parts is \(500, the shipping cost per part is \)0.5. This $0.5 per - part shipping cost, when combined with other costs, can affect the final price of the product and its competitiveness in the market.
Step - by - Step Guide to Creating a Plastic Part Costing Sheet
Step 1: Gather Accurate Data
Accurate data collection is the cornerstone of creating a reliable Plastic Part Costing Sheet. Without precise data, the costing sheet will be inaccurate, leading to poor financial planning and potentially costly mistakes in the manufacturing project.
Material Specifications: First and foremost, obtain detailed information about the plastic materials to be used. This includes the type of plastic (e.g., PE, PP, PC, ABS), its grade, and any special properties or additives. For example, if a plastic part requires UV - resistant properties, a specific grade of plastic with UV - stabilizers will be needed, and these materials often come at a higher cost. You can gather this information from material suppliers. Most suppliers provide product data sheets that list the material's specifications, price, and minimum order quantities.
Manufacturing Process Details: Understand the manufacturing process thoroughly. If it's injection molding, know the cycle time of the injection molding machine, the number of cavities in the mold, and any special processing requirements such as high - pressure injection or special cooling techniques. For blow molding, details like the pre - form size, blowing pressure, and the type of blow molding machine are crucial. These details can be obtained from the manufacturing engineers or the production team within your company. If you are outsourcing the manufacturing, the contract manufacturer should be able to provide this information.
Labor Information: Identify all the labor - related aspects. Determine the number of workers required for each stage of production, their hourly wage rates, and the estimated time they will spend on the project. For example, in a plastic toy manufacturing process, workers may be involved in tasks such as operating the injection molding machine, assembling the parts, and conducting quality control checks. Labor unions or industry standards can be a good source for wage rate information, and time - and - motion studies within the production facility can help estimate the time spent on each task.
Step 2: Calculate Each Cost Component
Once you have collected all the necessary data, it's time to calculate each cost component accurately.
Material Cost Calculation:
- As mentioned before, the formula for calculating material cost is Material Cost = Material Quantity × Material Unit Price. Let's take an example of manufacturing a plastic container. If the container requires 0.2 kg of PP material, and the unit price of PP is \(2.5 per kg, then the material cost for one container is \)2.5×0.2 = \(0.5. If there is a 5% material waste during the production process, you need to adjust the material quantity accordingly. So, the actual material quantity used for cost calculation would be 0.2×(1 + 0.05)=0.21 kg, and the adjusted material cost would be \)2.5×0.21 = $0.525.
Manufacturing Process Cost Calculation:
- Injection Molding:
- Equipment Depreciation: Suppose an injection molding machine costs \(80,000 and has a lifespan of 8 years with 2,000 working hours per year. The annual depreciation is \)80,000÷8 = \(10,000. The hourly depreciation cost is \)10,000÷2,000 = \(5. If a plastic part has a production cycle of 30 seconds (0.5 minutes) and the machine runs continuously, the depreciation cost per part related to the equipment is \)5×(0.5÷60)=$0.042.
- Energy Consumption: If the injection molding machine consumes 15 kWh per hour and the electricity cost is \(0.12 per kWh, the energy cost per hour is \)15×0.12 = \(1.8. For a 30 - second production cycle, the energy cost per part is \)1.8×(0.5÷60) = $0.015.
- Mold Costs: If a mold for the plastic part costs \(8,000 and is expected to produce 80,000 parts, the mold cost per part is \)8,000÷80,000 = $0.1.
- Blow Molding:
- Equipment and Depreciation: A blow molding machine costs \(50,000 with a lifespan of 6 years and 1,800 working hours per year. The annual depreciation is \)50,000÷6≈\(8,333. The hourly depreciation cost is \)8,333÷1,800≈\(4.63. If the production cycle for a blow - molded product is 40 seconds (0.67 minutes), the depreciation cost per part is \)4.63×(0.67÷60)≈$0.052.
- Energy and Labor: If the blow molding machine consumes 10 kWh per hour with an electricity cost of \(0.1 per kWh, the energy cost per hour is \)10×0.1 = \(1. For a 40 - second cycle, the energy cost per part is \)1×(0.67÷60)≈$0.011.
Labor Cost Calculation:
- For a production line with 3 machine operators, each earning \(18 per hour, and they work 8 hours a day to produce 1,000 plastic parts. The total labor cost for the day is \)18×3×8 = \(432. The labor cost per part is \)432÷1,000 = $0.432.
Overhead Cost Calculation:
- Using the overhead rate method, if the total overhead costs for a month are \(30,000 and the total labor hours in that month are 1,500 hours, the overhead rate per labor hour is \)30,000÷1,500 = \(20. If a plastic part requires 0.3 labor hours to produce, the overhead cost allocated to that part is \)20×0.3 = $6.
Additional Cost Calculation:
- Packaging: If a plastic part is packed in a plastic bag that costs \(0.05 each and a cardboard box that costs \)0.2 per box, and each box can hold 50 parts. The packaging cost per part is (\(0.05 + \)0.2)÷50 = $0.005.
- Shipping: If the shipping cost for a batch of 500 plastic parts to a local destination is \(100, the shipping cost per part is \)100÷500 = $0.2.
Step 3: Review and Validate the Costing Sheet
Reviewing and validating the costing sheet is essential to ensure its accuracy and reliability.
- Data Accuracy Check: Double - check all the data entered in the costing sheet. Make sure that the material quantities, unit prices, labor hours, and all other data points are correct. For example, verify that the material unit price is the current market price and that the labor hours are based on accurate time - and - motion studies. One way to do this is to cross - reference the data with multiple sources. If you obtained the material price from a supplier, also check industry price reports to confirm its reasonableness.
- Cost Calculation Review: Review the cost calculations for each component. Ensure that the formulas used are correct and that all factors have been considered. For instance, in calculating the manufacturing process costs, make sure that all aspects of equipment depreciation, energy consumption, and mold costs are accurately accounted for. Have a second person, preferably someone with knowledge of cost accounting or manufacturing processes, review the calculations.
- Market and Industry Comparison: Compare the total cost and individual cost components with industry benchmarks and market trends. If your calculated material cost for a particular plastic part is significantly higher than the industry average, investigate the reasons. It could be due to inefficiencies in the production process, over - estimation of material waste, or an overpriced material supplier. This comparison can help you identify areas where costs can be reduced or where the costing sheet may be inaccurate.
Yigu Technology's Perspective
As a non - standard plastic metal products custom supplier, Yigu Technology has rich experience in creating plastic part costing sheets. When it comes to material selection, we always consider the balance between product performance and cost. For example, instead of blindly choosing high - cost high - performance materials, we analyze the actual needs of the product. If the product doesn't require extremely high - temperature resistance, we won't choose expensive high - temperature - resistant plastics. This way, we can reduce material costs without sacrificing product quality.
Regarding manufacturing processes, we have in - depth knowledge of various techniques. We know that for simple - shaped hollow plastic products, blow molding can be more cost - effective, while for complex - shaped and high - precision parts, injection molding might be the better choice. By accurately assessing the product requirements, we can select the most suitable process, thus controlling the manufacturing process costs.
In the cooperation with customers, we work closely with them from the very beginning of the project. We help customers understand the cost - influencing factors and jointly explore ways to optimize costs. For instance, we may suggest design modifications that do not affect the product's functionality but can simplify the manufacturing process and reduce costs. Through such collaborative efforts, we ensure that the final plastic part costing sheet is not only accurate but also reflects the best cost - performance ratio for the customer's manufacturing project.
