Introduction
Definition and Importance of Lens Injection Molding
Lens injection molding is a specialized manufacturing process that involves injecting molten plastic or other suitable materials into a precisely designed mold to create lenses with specific optical properties. This process is a subset of the broader injection molding technology, which is widely used for mass - producing plastic parts. However, lens injection molding requires a much higher level of precision due to the strict optical requirements of lenses.
In the lens injection molding process, the raw material, usually in pellet form, is first heated in a barrel until it reaches a molten state. A screw or plunger then forces this molten material into a closed mold cavity that has the exact shape of the desired lens. Once the mold is filled, the material cools and solidifies, taking on the shape of the lens. After the cooling process is complete, the mold opens, and the newly formed lens is ejected.
The importance of lens injection molding in the optical and related industries cannot be overstated. In the optical industry, lenses are the fundamental components of various optical devices, such as cameras, microscopes, telescopes, and eyeglasses. High - quality lenses produced through injection molding ensure clear and accurate imaging, which is crucial for applications ranging from scientific research to everyday photography.
Types of Lens Injection Molding
Conventional Injection Molding
Working Principle: In conventional lens injection molding, the process begins with plastic pellets being fed into a heated barrel. The barrel heats the pellets until they reach a molten state. A screw - type mechanism then forces this molten plastic through a nozzle and into a closed mold cavity. The mold cavity has the exact shape of the desired lens. Once the cavity is filled, the plastic cools and solidifies. After the cooling phase, the mold opens, and the newly formed lens is ejected. For example, in the production of simple plano - convex lenses for basic optical instruments, this straightforward process is often employed.
Suitable Scenarios: Ideal for producing lenses with simple shapes such as standard convex or concave lenses used in common cameras, magnifying glasses, and basic optical sensors.
Overmolding for Lenses
Application in Lens Manufacturing: Overmolding in lens production is a process where a secondary material is molded over an already - formed lens or a lens - like structure. This is often used to create multi - layer lenses. For example, a soft, impact - resistant outer layer can be overmolded onto a hard, optically - clear inner lens.
Achieving Multi - layer Structures: First, the base lens is produced through an initial molding process, which could be conventional injection molding. Then, the base lens is placed into a new mold cavity, and the second material is injected around it. The two materials bond together during the cooling process, creating a unified multi - layer lens.
Insert Molding in Lens Production
Role in Lens Production: Insert molding in lens production involves placing a pre - formed component (the insert) into the injection mold before the plastic is injected. This insert can be a metal ring, a plastic spacer, or an optical fiber. For example, a metal ring insert can be used to provide additional mechanical support to the lens, especially in applications where the lens needs to be mounted securely.
Enhancing Structure or Adding Functional Components:
- Mechanical reinforcement: A metal insert can significantly increase the strength of the lens, making it suitable for applications where the lens may be subject to mechanical stress. In a high - end camera lens that needs to withstand vibrations during use, a metal insert can prevent the lens from cracking or deforming.
- Adding functionality: Inserting an optical fiber into the lens during the molding process can create a lens with built - in light - guiding capabilities. This is useful in applications such as endoscopes, where light needs to be transmitted to the viewing area.
Materials for Lens Injection Molding
Thermoplastics
Thermoplastics are a popular choice for lens injection molding due to their ability to be melted and reshaped multiple times. Some of the commonly used thermoplastics in lens manufacturing include:
- Polycarbonate (PC): PC is a high - performance thermoplastic with excellent impact resistance, high heat resistance (it can withstand temperatures up to around 135 - 140°C), and good dimensional stability. It has a relatively high refractive index, around 1.586, which makes it suitable for applications where light control is crucial. For example, in the production of safety goggles lenses, PC's impact - resistant property ensures the safety of the wearer, while its optical properties maintain clear vision. However, PC has some drawbacks such as a relatively high birefringence, which may limit its use in some high - precision optical applications.
- Polymethyl Methacrylate (PMMA): Also known as acrylic, PMMA is highly transparent, with a light transmittance of up to 92%. It has a lower refractive index than PC, approximately 1.49, and a relatively low birefringence, making it ideal for applications where high - quality, clear imaging is required, like in smartphone camera lenses. PMMA is also resistant to ultraviolet (UV) light to some extent. But it has a lower heat resistance compared to PC, typically softening at around 105°C, and is more prone to scratching.
- Polystyrene (PS): PS is another thermoplastic used in lens injection molding. It has a refractive index of about 1.59, which is useful for certain optical designs, especially when combined with other materials to correct chromatic aberration. PS is relatively inexpensive and easy to process. For instance, it can be used in the production of simple magnifying glasses. However, PS has a relatively high brittleness and is more sensitive to environmental stress cracking.
Thermosetting Plastics
Thermosetting plastics, unlike thermoplastics, undergo a chemical change during the molding process and cannot be remelted and reshaped once cured. In lens manufacturing:
- Epoxy - based Resins: Epoxy resins are sometimes used in the production of lenses, especially for applications that require high - temperature resistance and excellent chemical stability. For example, in some industrial - grade optical lenses that are exposed to harsh chemical environments, epoxy - based thermosetting plastics can maintain their integrity. Once cured, they form a highly cross - linked structure, which gives them high hardness and dimensional stability. However, the curing process of thermosetting plastics is often more complex and time - consuming compared to thermoplastics.
- Comparison with Thermoplastics:
- Mechanical Properties: Thermosetting plastics generally have higher hardness and better dimensional stability at high temperatures compared to thermoplastics. This makes them suitable for lenses that need to maintain their shape under extreme conditions.
- Processing: Thermoplastics are easier to process as they can be melted and molded repeatedly, while thermosetting plastics require a specific curing process that is irreversible.
- Recyclability: Thermoplastics are more recyclable, which is an advantage in terms of environmental friendliness and cost - effectiveness in the long run, while thermosetting plastics are difficult to recycle.
Specialty Materials
- Optical - grade Silicone: Optical - grade silicone is a specialty material with unique properties. It has an extremely high transparency, with a light transmittance often exceeding 90%. One of its key advantages is its excellent flexibility and high resistance to temperature changes, with a wide operating temperature range from - 50°C to 200°C. In the production of lenses for LED lighting systems, optical - grade silicone can be used to encapsulate the LED chips and also serve as a lens material. Its flexibility allows it to conform to different shapes easily, and its high - temperature resistance ensures stable performance during the operation of the LED, which generates heat. Additionally, silicone has good resistance to UV light and moisture, making it suitable for outdoor optical applications such as outdoor cameras and solar concentrators.
Design Considerations for Lens Injection Molding
Geometric Design
The geometric design of lenses is crucial as it directly impacts their optical performance. Parameters such as curvature and thickness need to be carefully optimized.
Curvature: The curvature of a lens determines its focal length and the way it refracts light. For a convex lens, a more pronounced curvature will result in a shorter focal length, causing light rays to converge more strongly. In contrast, a concave lens with a specific curvature will diverge light rays. For example, in a camera lens system, different lens elements with precisely calculated curvatures are combined to correct for aberrations and achieve high - quality imaging. A slight deviation from the optimal curvature can lead to issues like blurred images, chromatic aberration (color fringing), or spherical aberration (where light rays from different parts of the lens do not focus at the same point).
Thickness: The thickness of the lens affects not only its optical power but also its mechanical properties and manufacturing complexity. In general, thicker lenses can provide more optical power for a given curvature. However, extremely thick lenses can be heavy, increase material costs, and may also introduce additional optical problems such as increased light absorption and scattering. For example, in eyeglass lenses, high - index materials are often used to reduce the thickness of the lens while maintaining the required optical correction, especially for people with strong prescriptions. This not only improves the aesthetics and comfort of wearing glasses but also reduces the weight and cost associated with overly thick lenses.
Draft Angles and Wall Thickness
Draft Angles: Draft angles are essential in lens injection molding to ensure smooth ejection of the molded lens from the mold. A draft angle is a slight taper added to the vertical surfaces of the lens mold cavity. The typical range of draft angles for lens injection molding is between 0.5° - 2°.
If the draft angle is too small or non - existent, the lens may experience high friction during ejection, which can cause damage such as scratches, deformation, or breakage. In extreme cases, the lens may even get stuck in the mold, leading to production delays and increased waste. On the other hand, an overly large draft angle can affect the dimensional accuracy of the lens, especially for lenses with tight tolerances. For example, in the production of precision lenses for medical endoscopes, a carefully calibrated draft angle is crucial to maintain the lens's shape and optical quality while allowing for easy 脱模.
Wall Thickness: Maintaining a consistent wall thickness is vital to prevent defects during the injection molding process. Uneven wall thickness can lead to several issues. First, it can cause differential cooling rates. Thicker sections of the lens will cool more slowly than thinner sections. This difference in cooling rates can result in internal stresses within the lens, leading to warping or cracking. For instance, if a lens has a thick central portion and thin edges, the central part will shrink more during cooling, causing the lens to warp out of shape.
Secondly, uneven wall thickness can affect the flow of the molten plastic during injection. The plastic may flow more easily through thinner sections, leading to inconsistent filling of the mold cavity. This can result in voids, short - shots (where the mold is not fully filled), or areas of weak bonding within the lens, all of which can degrade the lens's optical and mechanical properties.
Gate and Runner Design
Gate Design: The gate is the small opening through which the molten plastic enters the mold cavity. Gate design has a significant impact on the quality of the molded lens. There are several common types of gates:
- Pin Point Gate: This type of gate has a very small diameter, typically around 0.5 - 1.5 mm. It is often used for high - precision lenses as it leaves a small, easily removable mark on the lens. The small size of the pin - point gate also allows for better control of the plastic flow, reducing the risk of jetting (where the plastic squirts into the cavity in a non - uniform manner) and ensuring a more even filling of the mold. However, due to its small size, it can cause high shear stress on the plastic, which may be a concern for some materials.
- Side Gate: A side gate is located on the side of the mold cavity. It is relatively easy to design and manufacture. Side gates are suitable for lenses with less complex shapes and can handle a relatively large volume of plastic flow. They are often used in the production of lenses for general - purpose applications such as magnifying glasses. However, side gates may leave a more visible mark on the lens compared to pin - point gates, which can be a cosmetic issue for some applications.
Runner Design: The runner is the channel that connects the injection nozzle to the gate. The design of the runner affects the pressure drop and the distribution of the molten plastic.
- Runner Diameter: A proper runner diameter is crucial. If the diameter is too small, there will be a high pressure drop, which may cause the plastic to cool prematurely or not reach all parts of the mold cavity. This can lead to incomplete filling or uneven distribution of the plastic. For example, in a multi - cavity mold for lens production, if the runner diameter is not optimized, some cavities may receive less plastic than others, resulting in inconsistent lens quality. On the other hand, an overly large runner diameter can waste material and increase the cooling time, reducing production efficiency.
- Runner Layout: The layout of the runner can be simple or complex depending on the number of cavities and the shape of the lenses. In a single - cavity mold, a straight - forward runner design may be sufficient. However, in a multi - cavity mold, a balanced runner system is often required. A balanced runner system ensures that the plastic reaches each cavity at the same time and with the same pressure. This can be achieved through careful design of the runner lengths and diameters, so that the flow resistance is equal for all cavities. For example, in a mold with four cavities arranged in a square pattern, the runner system may be designed in a star - like or circular pattern to evenly distribute the plastic to each cavity.
Equipment for Lens Injection Molding
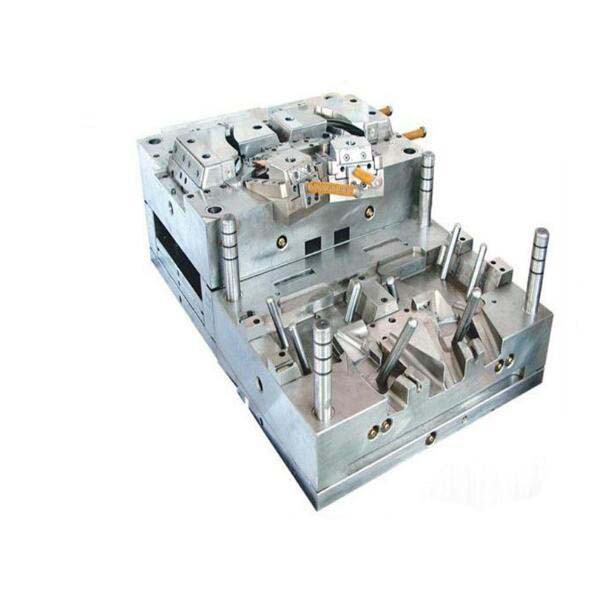
Injection Molding Machines
Injection molding machines are the core equipment in lens injection molding. They consist of several key components, each playing a crucial role in the molding process.
The working principle of an injection molding machine for lens production is as follows: First, plastic pellets are fed into the hopper and then enter the barrel. As the screw rotates, the plastic is conveyed forward, melted, and homogenized. Once the required amount of molten plastic is accumulated at the front of the barrel, the screw stops rotating, and a hydraulic or electric mechanism pushes the screw forward, injecting the molten plastic into the closed mold cavity at high pressure. After the mold is filled, the plastic is held under pressure (the holding pressure stage) to compensate for the shrinkage during cooling. Once the plastic has cooled and solidified sufficiently, the mold opens, and the newly formed lens is ejected, usually by ejector pins.
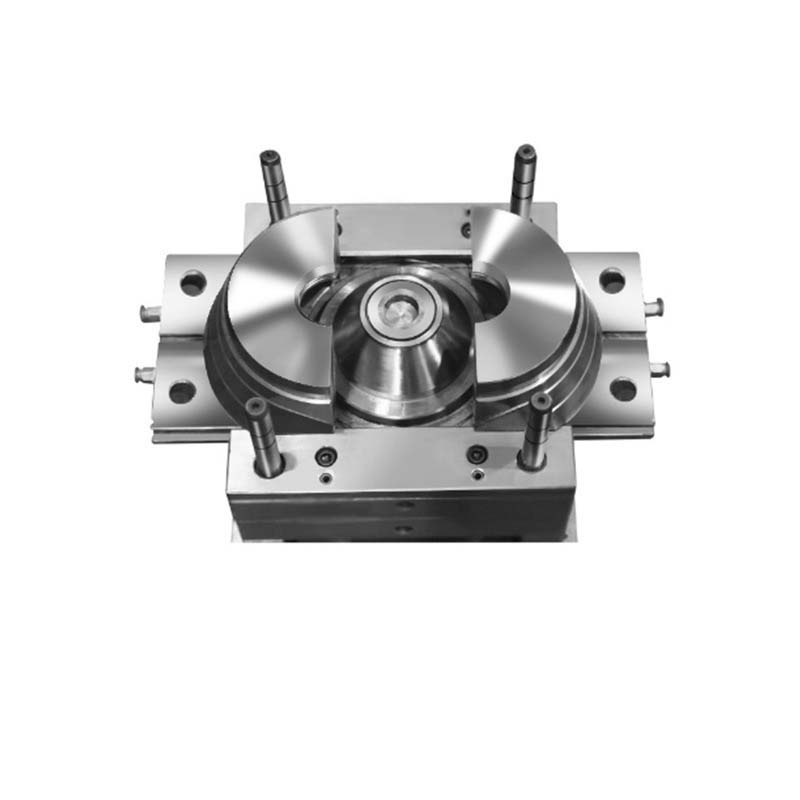
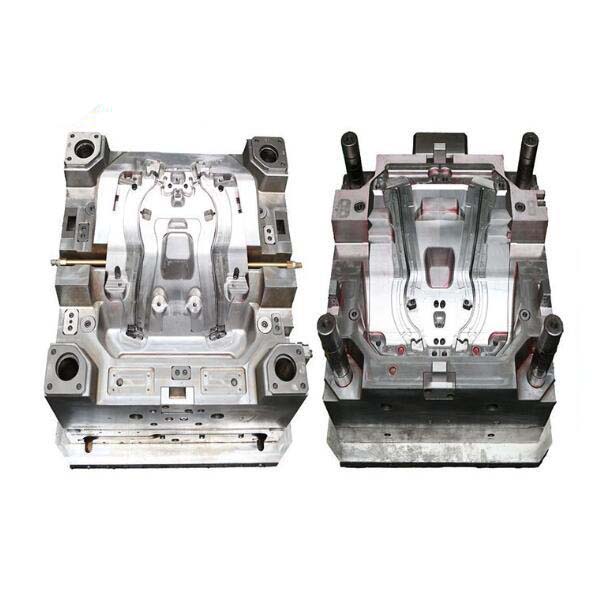
Mold Design and Manufacturing
The precision requirements for mold design and manufacturing in lens injection molding are extremely high. Since the final optical performance of the lens depends significantly on the mold's accuracy, every aspect of the mold design must be carefully considered.
- Dimensional Accuracy: The mold's dimensions need to be accurate to within micrometers. For example, the radius of curvature of a lens - forming surface in the mold should match the design specifications with an error of no more than ±0.001 mm. Even a slight deviation in the mold's dimensions can lead to changes in the lens's focal length, refractive power, and other optical properties, resulting in a defective lens.
- Surface Finish: The surface of the mold that comes into contact with the molten plastic must have an extremely smooth finish. A rough surface can cause scratches or surface defects on the lens, which will scatter light and reduce the lens's optical clarity. The surface roughness of the mold is often specified in terms of Ra (arithmetical mean deviation of the assessed profile), and for high - quality lens molds, Ra values as low as 0.01 - 0.05 μm are required.
Advanced manufacturing technologies are widely used to meet these high - precision requirements. Computer - Aided Design (CAD) and Computer - Aided Manufacturing (CAM) are fundamental tools. In the design phase, CAD software allows engineers to create highly detailed 3D models of the mold, precisely defining all the geometric features and tolerances. This digital model can then be used to generate tool paths for CAM - controlled machining processes.
- Electrical Discharge Machining (EDM): EDM is often used to create complex shapes in the mold that are difficult to machine using traditional methods. In EDM, a shaped electrode is used to erode the mold material (usually steel) by a series of electrical discharges. This process can achieve very high precision, with tolerances down to ±0.005 mm, and is particularly useful for creating intricate details such as fine grooves or small holes in the mold.
- High - Speed Milling: High - speed milling is another important technology. It uses high - speed rotating cutting tools to remove material from the mold blank. The high - speed operation allows for faster machining and better surface finish. For example, in the production of lens molds, high - speed milling can be used to machine the lens - forming surfaces with a very fine finish, reducing the need for extensive post - machining polishing.
Auxiliary Equipment
Auxiliary equipment plays a vital role in supporting the injection molding process for lens production.
- Cooling System: A cooling system is essential to remove heat from the mold and enable the molten plastic to solidify quickly and evenly. Most cooling systems use water as the cooling medium. Cooling channels are designed within the mold, and water is circulated through these channels to absorb the heat generated by the molten plastic. For example, in a multi - cavity lens mold, the cooling channels are carefully designed to ensure that each cavity is cooled uniformly. If one cavity cools faster or slower than the others, it can lead to differences in the shrinkage of the lenses, resulting in inconsistent dimensions and optical properties. The temperature of the cooling water is also carefully controlled, typically within a narrow range of ±1 - 2°C, to ensure stable cooling conditions.
- Dryer: A dryer is used to remove moisture from the plastic raw materials before they are fed into the injection molding machine. Moisture in the plastic can cause several problems during the molding process. When the moist plastic is melted, the water vaporizes, creating bubbles or voids in the lens, which can significantly degrade its optical quality. For hygroscopic materials like polycarbonate, it is crucial to reduce the moisture content to very low levels, often below 0.02%. Dryers can use various methods, such as hot - air drying or desiccant drying, to achieve the required low - moisture state of the plastic.
Yigu Technology's Perspective
As a non - standard plastic metal products custom supplier, Yigu Technology deeply understands the significance of lens injection molding. In terms of materials, we are constantly exploring innovative materials. For example, we are researching new types of thermoplastics with even better optical properties and mechanical stability. These new materials can potentially reduce the weight of lenses while maintaining high - quality optical performance, which is crucial for applications like wearable optical devices.
In the aspect of process optimization, we focus on improving the precision of each molding step. By using advanced sensors and control systems, we can more accurately monitor and adjust parameters such as temperature, pressure, and injection speed during the injection molding process. This helps to minimize defects and ensure the consistent quality of lenses. Additionally, we pay close attention to the mold design and manufacturing process, collaborating with top - notch mold designers to create molds that can better meet the complex geometric requirements of lenses.