What is Injection Molding
Injection molding is a widely used manufacturing process that involves injecting molten material into a mold cavity, where it cools and solidifies to form a desired shape. This process is not limited to plastic; it can also be applied to materials like metal, rubber, and glass. However, in the plastics industry, injection molding often specifically refers to plastic injection molding, which is a subset of the broader injection molding process. In everyday usage, the terms "injection molding" and "plastic injection molding" are frequently used interchangeably, especially when discussing the production of plastic parts.
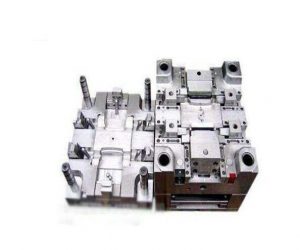
The injection molding process begins with the design of a mold, which is typically made of steel or aluminum. The mold consists of two halves that, when closed, form a cavity in the shape of the final product. Material, often in pellet form, is fed into a hopper and then into a heated barrel. Inside the barrel, a screw or plunger melts the material by applying heat and pressure, and then forces the molten material through a nozzle and into the mold cavity. Once the cavity is filled, the material cools and solidifies, taking on the shape of the mold. Finally, the mold opens, and the finished part is ejected. This cycle can be repeated rapidly, making injection molding an efficient method for high - volume production.
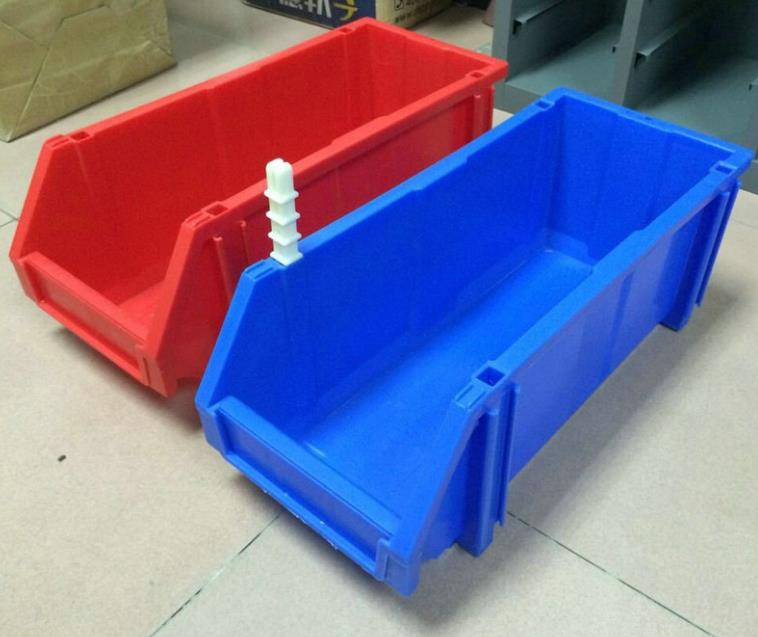
For example, in the production of plastic toys, injection molding allows manufacturers to create thousands of identical toy parts in a short period. The process ensures consistent quality and precise dimensions, which are crucial for mass - produced items.
The Process of Injection Molding
Injection molding is a complex process that involves several crucial steps, each with its own significance in determining the quality and characteristics of the final product.
1. Plastic Material Preparation
The first step in injection molding is plastic material preparation. Plastic materials, which are typically in the form of granules or powder, are carefully loaded into the hopper of the injection molding machine. The quality of the raw material is of utmost importance as it directly impacts the final product's quality. For example, impurities in the plastic granules can lead to defects such as black spots or weak points in the finished part. Different types of plastics have varying properties, so selecting the right material for the intended application is essential. High - density polyethylene (HDPE) is often chosen for products that require high strength and chemical resistance, like industrial containers, while acrylonitrile butadiene styrene (ABS) is popular for its good impact resistance and surface finish, making it suitable for electronic device housings.
2. Heating and Melting
Once in the hopper, the plastic material is pushed forward by a screw or a plunger into the heated barrel. Here, the magic of melting occurs. As the plastic moves through the barrel, it is gradually heated to its melting point. Temperature control is critical during this stage. If the temperature is too low, the plastic may not fully melt, resulting in an uneven flow during injection and potential defects in the final product, such as short - shots (where the mold cavity is not completely filled). On the other hand, if the temperature is too high, the plastic can degrade, losing its mechanical properties and potentially causing discoloration. For instance, polypropylene (PP) typically has a melting range of 160 - 170°C, and maintaining the heating zone within this range is crucial for successful processing.
3. Injection
After the plastic has been melted to a uniform, viscous state, it's time for the injection stage. The molten plastic is forced, under high pressure, through a nozzle and into the cooled metal mold cavity. The pressure and speed at which the plastic is injected play significant roles in the product's formation. High injection pressure can help fill complex mold cavities more effectively, but it also increases the risk of flash (thin, unwanted layers of plastic that form around the edges of the mold) and excessive stress on the part. Injection speed, too, must be carefully controlled. A slow injection speed might lead to incomplete filling, while a very fast speed can cause air traps or turbulence in the molten plastic, which can result in voids or surface imperfections in the final product.
4. Cooling and Solidification
Once the mold cavity is filled with molten plastic, the cooling and solidification stage begins. The mold is designed to dissipate heat rapidly, allowing the plastic to cool and take on the shape of the mold cavity. The cooling rate has a direct impact on both product quality and production efficiency. A slow cooling rate can lead to warping, as different parts of the plastic cool at different rates, causing internal stresses. For example, in the production of large, flat plastic sheets, slow cooling can cause the sheet to bend or twist. On the other hand, a very fast cooling rate can sometimes result in a brittle product, as the polymer chains do not have enough time to align properly. Balancing the cooling rate is crucial, and techniques such as controlling the temperature of the cooling medium (usually water) flowing through channels in the mold are often employed.
5. Mold Opening and Part Removal
When the plastic has cooled and solidified sufficiently, the mold opens, and the 成型制品 is removed. This step requires care to avoid damaging the part. Sometimes, ejection pins are used to push the part out of the mold. However, if the ejection force is not evenly distributed or is too strong, it can cause marks on the part or even break it. In some cases, especially for complex or delicate parts, additional tools or manual assistance may be needed to ensure a smooth removal process.
6. Post - processing
After the part is removed from the mold, post - processing steps may be necessary to achieve the final product requirements. This can include removing any flash or excess material, which is often done using trimming tools or by mechanical means such as grinding. Surface finishing operations like painting can enhance the product's appearance and provide additional protection. For example, plastic toys may be painted to add color and detail, while plastic automotive parts may be painted for both aesthetic and corrosion - resistance purposes. Other post - processing steps could involve adding inserts, assembly with other components, or heat - treating to improve the material's mechanical properties.
Tips to Master the Art of Injection Molding
1. Material Selection
Selecting the right plastic material is fundamental to the success of injection molding. When making this choice, several factors related to the product's performance requirements must be considered.
Mechanical Properties: For products that need to withstand high stress, such as automotive parts like brackets, materials with high tensile strength like polycarbonate (PC) are preferred. PC has excellent impact resistance, making it suitable for applications where it may be subject to sudden forces. On the other hand, if flexibility is required, thermoplastic elastomers (TPEs) are a great option. TPEs can be found in products like flexible seals and grips, providing both elasticity and durability.
Thermal Properties: When a product will be exposed to high temperatures, materials with good heat resistance should be selected. For example, in the production of kitchen utensils that come into contact with hot surfaces, polyphenylene sulfide (PPS) is often used. PPS has a high melting point and can maintain its mechanical properties even at elevated temperatures. Conversely, for products used in low - temperature environments, materials with good low - temperature toughness, like some grades of polyethylene, are more appropriate.
One way to assist in material selection is by referring to material property databases, such as those provided by major plastic resin suppliers. These databases offer comprehensive information on the mechanical, thermal, chemical, and other properties of different materials. Additionally, conducting small - scale tests with sample materials can provide practical insights into how a particular material will perform in the injection molding process and in the final product application.
2. Mold Design Optimization
A well - designed mold is crucial for successful injection molding. It directly impacts the quality of the final product, production efficiency, and cost.
Mold Structure: The overall structure of the mold should be robust and able to withstand the high pressures during injection. For complex - shaped products, a multi - cavity mold might be designed to increase production volume. For example, in the production of small plastic buttons, a multi - cavity mold can produce dozens of buttons in a single cycle. However, the design of the cavities must ensure uniform filling and cooling to prevent defects such as uneven wall thickness or warping.
Cooling System: An efficient cooling system is essential for reducing the cooling time and ensuring uniform solidification of the plastic. Cooling channels in the mold should be strategically placed to ensure that heat is dissipated evenly from all parts of the mold cavity. For instance, in the injection molding of large plastic panels, a cooling system with a series of parallel channels close to the cavity surface can help the panel cool uniformly, minimizing the risk of warping. Advanced mold designs may also incorporate conformal cooling, where the cooling channels are designed to follow the shape of the part, providing even more efficient heat transfer.
Gate Design: The gate is the opening through which the molten plastic enters the mold cavity. Gate design affects the flow of plastic, filling time, and the appearance of the final product. There are different types of gates, such as side gates, point gates, and film gates. For a thin - walled plastic container, a point gate may be used to ensure a smooth flow of plastic into the cavity without causing excessive shear stress. A wrong gate design can lead to issues like flow marks, short - shots, or excessive residual stress in the product. Comparing the performance of a mold before and after gate design optimization can clearly show the impact. For example, a mold with an initially poorly - designed gate may produce products with visible flow lines. After re - designing the gate to better control the plastic flow, the flow lines are eliminated, and the product quality is significantly improved.
3. Process Parameter Control
Precise control of process parameters is the key to achieving high - quality injection - molded products.
Temperature: There are two main temperature aspects to consider: the melt temperature and the mold temperature. The melt temperature affects the viscosity of the plastic. If it is too low, the plastic may not flow properly, leading to incomplete filling of the mold cavity. For example, when processing acrylonitrile - butadiene - styrene (ABS), if the melt temperature is set below the recommended range, the plastic may have a high viscosity, making it difficult to fill complex mold geometries. On the other hand, if the melt temperature is too high, the plastic may degrade, losing its mechanical properties and potentially causing discoloration. The mold temperature, on the other hand, influences the cooling rate of the plastic. A lower mold temperature generally results in a faster cooling rate, which can lead to internal stresses and warping in the product. However, in some cases, a lower mold temperature may be necessary to achieve a certain surface finish or to increase production efficiency.
Pressure: Injection pressure is the force used to inject the molten plastic into the mold cavity. It needs to be carefully adjusted according to the complexity of the mold, the viscosity of the plastic, and the desired filling time. High injection pressure can help fill complex molds quickly, but it also increases the risk of flash (excess plastic squeezing out between the mold halves) and high - stress levels in the product. After the mold is filled, the holding pressure is applied to compensate for the shrinkage of the plastic as it cools. If the holding pressure is too low, the product may have sink marks or be under - filled in some areas.
Speed: The injection speed determines how quickly the molten plastic is injected into the mold. A slow injection speed may cause the plastic to cool prematurely before fully filling the mold, resulting in a short - shot. In contrast, a very fast injection speed can cause air traps, turbulence, and excessive shear stress in the plastic, leading to defects such as voids or surface imperfections. For example, in the injection molding of a small, intricate plastic part, a moderate injection speed may be required to ensure that the plastic fills all the details of the mold without causing any of these issues.
Based on experience, it is often advisable to start with the manufacturer - recommended parameter settings for a particular plastic material and mold and then make small adjustments based on the observed product quality. Regularly monitoring and recording the process parameters can also help in quickly identifying and resolving any issues that may arise during production.
4. Quality Control
Establishing a comprehensive quality control system is essential for ensuring that the injection - molded products meet the required standards.
Raw Material Inspection: Before using any plastic material, it should be inspected to ensure its quality. This can include checking for impurities, verifying the material grade, and testing its physical properties such as melt flow index. For example, if the melt flow index of a plastic granule batch is outside the specified range, it may affect the injection molding process and the final product quality. Using spectrometers or other analytical tools can help in accurately identifying the material composition and detecting any contaminants.
Process Monitoring: During the injection molding process, continuous monitoring of key parameters such as temperature, pressure, and cycle time is crucial. Any deviation from the set parameters can be an early indication of a potential problem. For instance, if the temperature of the injection barrel suddenly drops, it may lead to inconsistent plastic melting and affect the product quality. Some modern injection molding machines are equipped with sensors and monitoring software that can provide real - time data on these parameters, allowing operators to take immediate corrective action.
Finished Product Inspection: After the products are ejected from the mold, they should be thoroughly inspected. This can involve visual inspection for surface defects such as scratches, cracks, or discoloration, as well as dimensional inspection using tools like calipers or coordinate measuring machines (CMMs). For products with specific functional requirements, additional tests such as strength testing, heat resistance testing, or chemical resistance testing may be necessary. For example, plastic components used in the medical industry need to meet strict biocompatibility and sterility standards, so they will undergo a series of specialized tests. The inspection should be carried out according to established quality standards, such as ISO standards or industry - specific standards.
Yigu Technology's View
As a non - standard plastic metal products custom supplier, Yigu Technology believes that the key to mastering the injection molding technology lies in a deep understanding of material characteristics. Different materials have significant differences in processing parameters. For mold design, it is necessary to consider the product structure and production efficiency. Optimizing the cooling system can shorten the production cycle. During production, process parameters should be strictly controlled and monitored in real - time. Employee training should also be emphasized to enhance operational skills and quality awareness, ensuring precise execution at every step and the production of high - quality products.
FAQs
1. What is the difference between injection molding and injection casting?
- Process: In injection molding, molten material is injected into a closed mold cavity under high pressure. After cooling and solidifying, the product is ejected. Injection casting, also known as reaction injection molding (RIM), involves injecting two or more reactive liquid components into a mold cavity. These components react and cure inside the mold to form the final product.
- Materials: Injection molding is suitable for a wide range of materials, including most thermoplastics and some thermosets. Injection casting is often used for materials like polyurethanes, which are formed through chemical reactions between different components.
- Product Characteristics: Injection - molded products usually have high precision and good surface finish, suitable for mass - production of small to medium - sized parts. Injection - cast products can have unique properties such as high flexibility or excellent insulation, often used for larger parts or products with specific mechanical requirements.
2. How to choose the right injection molding machine?
- Clamping Force: Calculate the projected area of the product on the mold parting surface. Multiply it by the estimated cavity pressure (which varies depending on the plastic material, usually 30 - 80 MPa for common plastics). Then, add a safety factor (usually 1.2 - 1.5) to get the required clamping force. For example, if the projected area is 100 cm² and the estimated cavity pressure is 50 MPa, the required clamping force is 100×50×1.3 = 6500 kN.
- Injection Volume: Determine the total volume of the plastic product and the runner system. The injection volume of the machine should be at least 1.3 - 1.5 times the total volume to ensure stable injection. For instance, if the total volume of the product and runner is 100 cm³, the injection volume of the machine should be around 130 - 150 cm³.
- Plasticizing Capacity: Consider the production rate and the type of plastic. The plasticizing capacity should be able to melt and supply the required amount of plastic within the cycle time. Faster production rates require higher plasticizing capacities. For high - volume production of a common plastic like polyethylene, a machine with a relatively high plasticizing capacity is needed.
3. What are the common defects in injection molding and how to solve them?
- Flash: This is the thin, excess plastic that forms around the edges of the mold. Solution: Check and increase the clamping force of the injection molding machine. Lower the injection pressure and speed. Inspect the mold for any damage or misalignment of the parting surfaces and repair if necessary.
- Sink Marks: These are small depressions on the surface of the product, usually caused by uneven cooling or insufficient packing pressure. Solution: Increase the packing pressure and time. Optimize the cooling system to ensure uniform cooling. Modify the product design to avoid thick - walled sections or add ribs to reduce shrinkage.
- Air Bubbles: Bubbles trapped inside the product can weaken its structure. Solution: Improve the mold venting to allow air to escape during injection. Slow down the injection speed to prevent air from being trapped. Dry the plastic material properly to remove moisture, as moisture can also cause gas formation during melting.