Tired of paying exorbitant machine shop prices for a basic heating chamber? In this guide, we'll show you how to design and build your own professional-grade heating chamber using inexpensive and widely available materials. You'll learn about thermal insulation, heating elements, temperature controls and more. By following our step-by-step instructions, you'll be molding parts like the big boys in no time!
Gathering Materials
To build your own injection mold heating chamber, you'll need to gather a variety of materials. Here are the essential items you'll need to get started:
Insulation Material
The insulation material is crucial for maintaining a stable and consistent temperature within the heating chamber. One commonly used insulation material is ceramic fiber blanket. It provides excellent thermal insulation properties and can withstand high temperatures. Alternatively, you can consider using high-temperature insulation boards or refractory bricks, depending on your specific requirements and budget.
Heating Elements
Heating elements are responsible for generating the heat required to maintain the desired temperature inside the chamber. There are different types of heating elements available, such as resistance wire coils or ceramic heaters. Choose heating elements that are suitable for the temperature range you intend to achieve and ensure they are compatible with the power supply you have available.
Temperature Control System
A reliable temperature control system is essential for accurately regulating and maintaining the temperature inside the chamber. Consider using a digital temperature controller that allows you to set and monitor the desired temperature. Make sure the temperature controller is capable of handling the temperature range required for your injection molding process.
Casing or Frame Material
You'll need a sturdy material to construct the outer casing or frame of the heating chamber. Steel or aluminum are common choices due to their strength and durability. Consider using metal sheets or extruded aluminum profiles to build the structure. Ensure the material you choose can withstand the weight and heat generated by the chamber and provide adequate support for all the components.
Sealing Materials
To prevent heat loss and maintain temperature stability, you'll need sealing materials for the chamber. High-temperature gaskets or heat-resistant silicone sealants can be used to seal any gaps or joints in the chamber structure. Make sure the sealing materials can withstand the temperature and provide an effective barrier against heat loss.
Wiring and Electrical Components
You'll need electrical wiring and components to connect the heating elements, temperature controller, and power supply. Use high-temperature wires and connectors capable of handling the electrical load and temperature requirements. It's essential to follow electrical safety guidelines and consult an electrician if you're unsure about the wiring and connections.
Tools and Equipment
Gather the necessary tools and equipment for the construction process, including a drill, screwdrivers, wrenches, measuring tape, and a level. Additionally, have safety equipment such as gloves, safety glasses, and a dust mask to ensure your safety during the construction process.
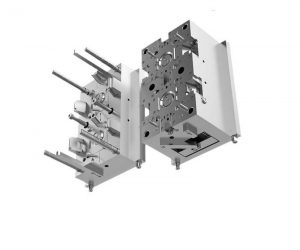
Designing the Chamber Shell
The design of the chamber shell is a critical aspect of constructing your heating chamber. Consider the following factors when designing the shell:
Size and Dimensions
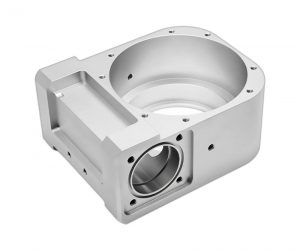
Determine the appropriate size and dimensions of the chamber based on the size of the injection molds you'll be using. Consider the maximum dimensions of the molds and allow for sufficient space around them for proper heat distribution. Ensure the chamber is large enough to accommodate the molds and any additional equipment needed for the injection molding process.
Structural Integrity
The chamber shell should be structurally sound and capable of withstanding the heat and weight associated with the injection molding process. Use sturdy materials and design the shell with adequate supports and reinforcements. Consider the load-bearing capacity of the materials and ensure they can handle the weight of the molds and other components.
Access Points
Design the chamber shell with appropriate access points to facilitate mold placement, removal, and maintenance. Include a large front opening or doors that provide easy access to the molds. Additionally, consider access points for the wiring and components to ensure they can be easily installed and serviced.
Ventilation and Exhaust
Proper ventilation and exhaust are essential to ensure the removal of fumes, gases, and excess heat from the chamber. Incorporate ventilation ports or ducts in the design to allow for the circulation of fresh air and the expulsion of hot air. Consider installing an exhaust fan or an exhaust system to maintain a comfortable working environment and prevent heat buildup.
Heat Distribution
Design the chamber shell to ensure efficient heat distribution throughout the chamber. Consider the placement of the heating elements and the insulation material to achieve even heat distribution. Avoid hotspots or areas with inadequate heat by strategically positioning the heating elements and using insulation effectively.
Ergonomics and Safety
Pay attention to ergonomics and safety aspects when designing the chamber shell. Ensure that the chamber's controls and displays are easily accessible and visible. Consider adding safety features such as emergency stop buttons, temperature alarms, and proper grounding to protect against electrical hazards.
By carefully gathering the necessary materials and designing the chamber shell, you're laying the foundation for constructing your own heating chamber. The right materialsand thoughtful design will contribute to the functionality, efficiency, and safety of your heating chamber. In the next sections, we will delve into the assembly process and the installation of heating elements in your DIY injection mold heating chamber. Stay tuned!
Note: Remember to always prioritize safety when working with electrical components and high-temperature environments. If you are unsure about any aspect of the construction process, consult with professionals or seek expert advice.
Installing Thermal Insulation
Thermal insulation is a crucial component of your DIY injection mold heating chamber, as it helps maintain a stable and consistent temperature within the chamber. Follow these steps to properly install the thermal insulation:
Prepare the Chamber Shell
Ensure that the chamber shell is clean and free from any debris or sharp edges that could damage the insulation material. Remove any existing insulation if necessary. Inspect the shell for any gaps or openings that need to be sealed before proceeding with the insulation installation.
Measure and Cut the Insulation Material
Measure the dimensions of the chamber shell and transfer the measurements onto the insulation material. Use a sharp utility knife or scissors to cut the insulation material according to the measurements. Make sure to leave some extra material to account for any overlaps or adjustments during the installation process.
Apply Adhesive (If Required)
Depending on the type of insulation material you're using, you may need to apply an adhesive to secure it to the chamber shell. Follow the manufacturer's instructions for the specific adhesive recommended for your insulation material. Apply the adhesive evenly on the shell surface or directly onto the insulation material if instructed.
Attach the Insulation Material to the Shell
Carefully position the cut insulation material onto the chamber shell, ensuring that it covers all sides and surfaces. Press the insulation material firmly against the shell to create a secure bond. Smooth out any wrinkles or air pockets to ensure proper insulation and adhesion. If using adhesive, allow sufficient time for it to cure and bond the insulation to the shell.
Seal Joints and Gaps
Inspect the insulation installation for any gaps, joints, or seams that need to be sealed. Use high-temperature gaskets or heat-resistant silicone sealants to seal these areas and prevent heat loss. Pay close attention to corners, edges, and any openings in the chamber shell. Ensure a tight seal to maintain temperature stability.
Reinforce Insulation (Optional)
For added insulation and heat retention, you may consider adding additional layers of insulation material. This can be particularly beneficial if you're working with high temperatures or aiming for precise temperature control. Follow the same steps as before to measure, cut, and attach the additional insulation layers. Ensure proper alignment and seal any joints or gaps between the layers.
Adding the Heating Element
The heating element is responsible for generating the heat required to maintain the desired temperature inside the heating chamber. Follow these steps to add the heating element to your DIY injection mold heating chamber:
Determine Heating Element Placement
Consider the design of your chamber shell and the heating requirements for your injection molding process. Identify the optimal placement for the heating element to achieve even heat distribution throughout the chamber. Common locations include the sides or bottom of the chamber, depending on the design and size of your molds.
Prepare the Heating Element
Ensure that the heating element is in good condition and free from any damage or defects. If necessary, cut or shape the heating element to fit the designated area within the chamber. Follow the manufacturer's instructions for any specific preparations required for your particular heating element type.
Secure the Heating Element
Attach the heating element to the designated area within the chamber shell. Use appropriate mounting brackets, clamps, or fasteners to secure the heating element in place. Ensure that the heating element is firmly and evenly attached to the chamber shell to promote efficient heat transfer.
Connect the Wiring
Follow the manufacturer's instructions for wiring the heating element to the electrical components of your heating chamber. Use high-temperature wires and connectors to handle the electrical load and withstand the operating temperatures. Ensure proper grounding and follow safety guidelines for electrical installations.
Test the Heating Element
Before proceeding with the final assembly of your heating chamber, perform a test to ensure the heating element is functioning correctly. Connect the heating element to the power supply and use the temperature control system to set the desired temperature. Monitor the heating element's performance and verify that it reaches and maintains the desired temperature.
By properly installing thermal insulation and adding the heating element, you're making significant progress in constructing your DIY injection mold heating chamber. The insulation ensures temperature stability, while the heating element provides the necessary heat for your injection molding process. In the next sections, we will cover additional steps, including the installation of the temperature control system and wiring for your heating chamber. Stay tuned for the next part of this guide!
Note: Always prioritize safety when working with high temperatures and electrical components. If you are unsure about any aspect of the installation process, consult with professionals or seek expert advice.
Setting Up Temperature Controls
Setting up the temperature controls in your DIY injection mold heating chamber is crucial for achieving precise temperature regulation. Follow these steps to properly set up the temperature control system:
Position the Temperature Controller
Choose a suitable location within easy reach of the operator to mount the temperature controller. Consider factors such as visibility, accessibility, and protection from heat and other environmental conditions. Mount the temperature controller securely using brackets or screws provided by the manufacturer.
Connect the Wiring
Refer to the wiring diagram provided by the temperature controller manufacturer to connect the necessary wires. Take care to follow the correct polarity and ensure proper grounding. Use high-temperature wires and connectors that can handle the electrical load and temperature requirements of your heating chamber.
Configure Temperature Settings
Access the settings menu on the temperature controller and configure the appropriate temperature settings for your injection molding process. Set the desired temperature range, alarms, and any additional parameters required. Consult the temperature controller's user manual for specific instructions on navigating the settings menu.
Calibrate the Temperature Controller
Temperature controllers may require calibration to ensure accurate temperature readings. Follow the calibration procedure outlined in the user manual provided by the manufacturer. This typically involves comparing the temperature readings on the controller with a calibrated thermometer and making necessary adjustments to align the readings.
Test the Temperature Control System
Before proceeding with the final assembly of your heating chamber, perform a test to ensure the temperature control system is functioning accurately. Set the temperature controller to a specific temperature and monitor the actual temperature inside the chamber using a calibrated thermometer or temperature sensor. Verify that the temperature controller maintains the desired temperature within an acceptable tolerance range.
Make Necessary Adjustments
If the temperature control system is not functioning as expected or there are discrepancies between the set temperature and actual temperature, make the necessary adjustments. This may involve recalibrating the temperature controller, checking the wiring connections, or troubleshooting any issues that arise. Consult the temperature controller's user manual or seek expert advice if needed.
Testing and Calibration
Once you have set up the temperature controls, it's essential to conduct thorough testing and calibration to ensure the proper functioning of your DIY injection mold heating chamber. Here are the steps to follow:
Preparation
Ensure that the chamber is free from any obstructions or debris that could interfere with the testing process. Place a calibrated thermometer or temperature sensor at various locations within the chamber to monitor temperature distribution. Connect the temperature controller to the power supply and ensure the chamber is properly insulated.
Temperature Ramp-Up Test
Begin the testing process by performing a temperature ramp-up test. Set the temperature controller to gradually increase the temperature from ambient to the desired operating temperature. Monitor the temperature readings at different locations within the chamber to ensure even heat distribution. Allow the chamber to stabilize at the desired temperature for a sufficient duration to verify temperature consistency.
Temperature Stability Test
Conduct a temperature stability test by monitoring the temperature inside the chamber over an extended period. Record temperature readings at regular intervals and compare them to the set temperature. Verify that the temperature remains within an acceptable tolerance range and does not deviate significantly.
Calibration Verification
Periodically verify the calibration of the temperature controller by comparing the controller's readings with a calibrated thermometer or temperature sensor. Perform this verification at different temperature settings to ensure accurate temperature control throughout the operating range.
Make Adjustments if Necessary
If any issues or discrepancies are identified during the testing and calibration process, make the necessary adjustments. This may involve recalibrating the temperature controller, adjusting the heating element placement, or addressing insulation or sealing issues. Repeat the testing and calibration process until the heating chamber operates within the desired temperature range with accuracy.
By setting up the temperature controls and conducting thorough testing and calibration, you ensure that your DIY injection mold heating chamber provides precise temperature regulation for your injection molding process. In the next sections, we will cover the final steps of the construction process, including connecting the wiring and performing safety checks. Stay tuned for the next part of this guide!
Note: Always prioritize safety when working with electrical components and high-temperature environments. If you are unsure about any aspect of the setup, testing, or calibration process, consult with professionals or seek expert advice.
Molding Your First Shot
After completing the installation of the thermal insulation, heating element, temperature controls, and conducting thorough testing and calibration, you're ready to mold your first shot using your DIY injection mold heating chamber. Follow these steps to ensure a successful molding process:
Prepare the Injection Mold
Ensure that your injection mold is clean and free from any debris or contaminants. Inspect the mold for any signs of damage or wear that could affect the molding process. Apply a suitable mold release agent or lubricant, if necessary, to facilitate the release of the molded part from the mold.
Preheat the Chamber
Before inserting the injection mold into the heating chamber, preheat the chamber to the desired operating temperature. Allow sufficient time for the chamber to reach and stabilize at the set temperature. Monitor the temperature using the temperature controller and ensure that it remains within the desired range.
Insert the Injection Mold
Carefully insert the prepared injection mold into the preheated chamber. Ensure that the mold is properly aligned and secured in place. Close the chamber door or cover and ensure a tight seal to minimize heat loss during the molding process.
Inject the Material
Follow the standard injection molding procedure to inject the material into the mold cavity. This typically involves operating the injection molding machine or manually injecting the material into the mold using suitable equipment. Monitor the injection process to ensure proper filling of the mold cavity.
Maintain the Temperature
Throughout the molding process, it is crucial to maintain the desired temperature within the heating chamber. Monitor the temperature controller and make adjustments as necessary to ensure temperature stability. Proper temperature control is essential for achieving consistent and high-quality molded parts.
Monitor the Molding Process
Keep a close eye on the molding process to ensure that it proceeds smoothly. Observe the filling of the mold cavity, cooling time, and any other parameters relevant to your specific injection molding process. Make adjustments to the injection parameters or mold temperature, if needed, to optimize the molding results.
Cool and Eject the Molded Part
Once the material has solidified within the mold cavity, initiate the cooling process. Depending on the material and part design, this may involve opening the heating chamber door or using cooling systems to accelerate the cooling rate. Once the part has cooled sufficiently, open the mold and eject the molded part from the injection mold.
Inspect and Evaluate the Molded Part
Thoroughly inspect the molded part for any defects, such as warping, flash, or incomplete filling. Evaluate the part's dimensions, surface finish, and overall quality. Compare the molded part to the desired specifications and assess whether it meets your expectations. Use this feedback to make any necessary adjustments for future moldings.
Congratulations on molding your first shot using your DIY injection mold heating chamber! Remember that achieving optimal molding results may require some experimentation and fine-tuning of process parameters. Continuously monitor and optimize your injection molding process to improve the quality and consistency of your molded parts.
Note: Always prioritize safety during the molding process, including wearing appropriate personal protective equipment and following safe operating procedures. If you encounter any difficulties or have specific questions about your injection molding process, consult with professionals or seek expert advice.