What Are Silicone Resin Molds?
Silicone resin molds are a remarkable innovation in the world of molding materials. They are made from a combination of silicon, a chemical element abundant in nature, and various organic compounds, which together endow the molds with unique properties. Silicon, known for its semi - conducting properties in the electronics industry, brings stability and durability when combined with organic substances to form silicone resin.
One of the most distinctive features of silicone resin molds is their exceptional elasticity. Unlike traditional rigid molds made of materials like metal or hard plastic, silicone resin molds can stretch and flex without breaking. This elasticity allows for easy removal of the molded objects, even those with intricate and detailed designs. For example, when creating a highly detailed figurine, a rigid mold might require forceful extraction that could damage the delicate features, but a silicone resin mold can be gently peeled away, preserving every nuance of the creation.
Durability is another key advantage. Silicone resin molds have a long lifespan. They can withstand repeated use, high temperatures (up to a certain limit, typically around 200 - 300°C depending on the specific type of silicone resin), and are resistant to chemicals and moisture. This makes them suitable for a wide range of applications.
In the arts and crafts field, silicone resin molds are extremely popular. Artists use them to create detailed sculptures, jewelry, and decorative items. For instance, in jewelry - making, these molds can reproduce the tiniest details of a gem - like pattern or a delicate filigree design with high precision. The ability to create multiple identical pieces from a single mold is also a huge boon for artisans who want to mass - produce their unique designs.
In the culinary world, silicone resin molds are widely used for making chocolates, candies, and intricate cake decorations. Their non - stick surface ensures that the sweet treats can be easily removed without any residue, and they can withstand the heat of the oven or the warmth of melted chocolate. You can create beautiful, professional - looking desserts at home using these molds, from heart - shaped chocolates for Valentine's Day to cute animal - shaped gummies for kids.
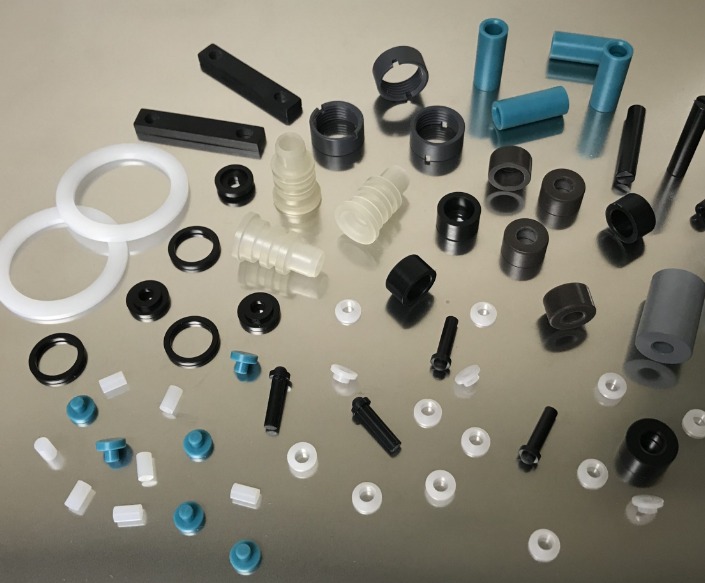
Industrially, silicone resin molds are employed in manufacturing processes. They are used to create parts for electronics, automotive components, and even in the production of medical devices. In the electronics industry, they can be used to mold soft rubber keypads or insulators, while in the automotive sector, they might be used to create small, flexible rubber parts that require a high degree of precision.
Comparing Silicone Resin Molds with Other Molds
When it comes to choosing the right mold for your project, understanding the differences between silicone resin molds and other common mold materials is crucial. Here's a detailed comparison in tabular form:
| Mold Type | Flexibility | Durability | Cost | Complexity of Making Intricate Designs | Suitable Materials |
| Silicone Resin Molds | Highly flexible. Can be stretched and bent without breaking, allowing for easy removal of complex - shaped objects. | Long - lasting. Resistant to heat (up to around 200 - 300°C), chemicals, and moisture. Can withstand repeated use. | Medium - high cost, but the long lifespan can make it cost - effective in the long run. | Exceptionally good at creating intricate designs. The flexibility helps in getting every detail right. | Suitable for a wide range of materials including resins, wax, chocolate, and some metals in low - temperature casting. |
| Metal Molds | Rigid with no flexibility. | Extremely durable, can last for a very long time even under high - pressure and high - temperature conditions. | High cost, especially for custom - made metal molds. | Limited in creating very intricate designs as the rigidity makes it difficult to remove the cast object without damage. | Ideal for high - volume production of metal parts, as well as for casting materials that require high - temperature processing like steel and aluminum. |
| Plastic Molds | Some plastics have a small degree of flexibility, but generally less than silicone. | Moderate durability. Can be damaged by heat, chemicals, and repeated use over time. | Low - medium cost, depending on the type of plastic. | Can create moderately complex designs, but not as detailed as silicone resin molds in some cases. | Suitable for molding plastics themselves, as well as some low - temperature - resistant materials like certain waxes. |
| Plaster Molds | Rigid and brittle. | Low durability. Prone to breakage and can be damaged by moisture. | Low cost. | Can create detailed designs, but the removal of the cast object can be tricky, and the mold may break during the process. | Mainly used for casting plaster - based materials, and also for some low - temperature wax casting. |
From the table, it's clear that silicone resin molds stand out in terms of flexibility and their ability to create highly detailed and intricate designs. While they may have a relatively higher initial cost compared to some other molds, their long - term durability and versatility often make them the preferred choice for many applications, especially in the arts, crafts, and small - scale production of delicate items.
Applications in Diverse Crafting Fields
Art and Sculpture
In the realm of art and sculpture, silicone resin molds have revolutionized the creative process. These molds enable artists to bring their most intricate and complex designs to life with precision and ease. For instance, consider the works of a renowned sculptor, [Artist Name]. When creating a large - scale, multi - piece sculpture for a public installation, the use of silicone resin molds was instrumental. The sculpture had numerous small, detailed components that needed to be replicated accurately. By using silicone resin molds, the artist could first create a master model of each component by hand - sculpting in a malleable material like clay. Then, a silicone resin mold was made from this master model. This mold was flexible enough to be removed from the master model without causing any damage, even around the most delicate edges and curves. Once the mold was created, the artist could cast multiple copies of the component in materials such as resin or plaster. This not only saved time compared to hand - sculpting each piece individually but also ensured consistency across all the components. In another case, for a fine - art exhibition, an artist creating a series of small, highly detailed figurines found silicone resin molds to be indispensable. The molds allowed the artist to capture every minute detail of the facial expressions, the folds of the clothing, and the texture of the hair on the figurines. With the help of these molds, the artist was able to produce a limited - edition series of sculptures, each one a near - perfect replica of the original design.
Jewelry Making
In jewelry making, silicone resin molds play a crucial role in the production of wax models, which are then used in the lost - wax casting process. This process is widely used to create high - quality, detailed jewelry pieces. For example, when a jewelry designer wants to create a complex pendant with filigree patterns, a wax model is first made using a silicone resin mold. The mold is filled with molten wax, and once the wax cools and solidifies, it can be easily removed, retaining all the intricate details of the mold's design. This wax model is then invested in a casting material, and the wax is melted out (the lost - wax process), leaving a cavity into which precious metals like gold, silver, or platinum can be poured. The use of silicone resin molds in jewelry making has several advantages. It allows for the creation of highly detailed and ornate jewelry designs that would be extremely difficult and time - consuming to achieve through other methods. Additionally, it improves the production efficiency. Instead of hand - carving each wax model, multiple wax models can be quickly made from a single silicone resin mold. This is especially beneficial for jewelry designers who want to produce small batches of their designs for sale or for custom - made jewelry orders. The quality of the final jewelry pieces is also enhanced, as the silicone resin molds ensure that the wax models are consistent in shape and detail, resulting in more uniform and precise castings.
Baking and Food Decoration
In the baking and food decoration industry, silicone resin molds have become a popular choice for both professional bakers and home cooks alike. These molds are made from food - grade silicone resin, which ensures that they are safe to use with food. They can be used to create a wide variety of unique - shaped cakes, chocolates, candies, and other sweet treats. For example, during holidays like Christmas, bakers often use silicone resin molds in the shapes of Christmas trees, snowflakes, and gingerbread men to make festive - shaped chocolates and cakes. In the case of making chocolates, the molds are filled with melted chocolate, and after it sets, the flexible silicone resin allows for easy removal of the chocolates without breaking them. The same principle applies to making cakes. A silicone resin cake mold can be used to create a cake in a heart - shaped, star - shaped, or even a more elaborate, three - dimensional shape. These molds are also heat - resistant, withstanding the high temperatures of the oven (usually up to around 230°C). This means that they can be used directly in the oven for baking cakes, eliminating the need for greasing or lining the molds as is often required with traditional metal or ceramic baking pans. Some of the most popular shapes for food - related silicone resin molds include animal - shaped molds for making cute gummies or jellies for kids, flower - shaped molds for elegant cake decorations, and geometric - shaped molds for creating modern - looking desserts.
DIY and Home Decor
For DIY enthusiasts and those interested in home decor, silicone resin molds offer a world of possibilities for creating personalized and unique decorative items. One simple DIY project is creating your own custom - shaped candles. First, choose a silicone resin mold in a shape you like, such as a seashell, a star, or a flower. Then, melt wax (you can add color and fragrance if you want) and pour it into the mold. Once the wax cools and hardens, gently peel away the silicone resin mold, and you have a beautiful, one - of - a - kind candle. Another project is making decorative vases. You can use a silicone resin mold to create a mold of a natural object like a tree bark or a coral reef. Then, pour a mixture of resin and a hardening agent into the mold. After it cures, the result is a stunning, textured vase that can be used to display flowers or as a standalone decorative piece. For those interested in wall art, silicone resin molds can be used to create relief - style wall decorations. By casting plaster or resin in a mold with an interesting pattern, such as a leaf pattern or a geometric pattern, and then painting it, you can create a unique piece of wall art that adds a personal touch to any room. The possibilities are endless, and silicone resin molds make it easy for anyone, regardless of their skill level, to create beautiful and functional home decor items.
Yigu Technology's Insights
As a non - standard plastic metal products custom supplier, Yigu Technology highly values the role of silicone resin molds. In the production of non - standard products, silicone resin molds offer distinct advantages. Their flexibility allows for the realization of complex designs that are often challenging with traditional molds. For example, when creating a custom - shaped plastic component with intricate internal channels, a silicone resin mold can conform to the complex shape, ensuring accurate replication. This not only enables the production of unique products but also shortens the production cycle.
Yigu Technology can leverage silicone resin molds to provide customized services that meet the diverse needs of customers. Whether it's creating small - batch prototypes or full - scale production runs, the company can work closely with clients to design and produce molds that precisely match their requirements. This personalized approach ensures that every non - standard product meets the highest quality standards and functionality expectations.
FAQs about Silicone Resin Molds
What is the lifespan of silicone resin molds?
Under normal usage and proper maintenance, silicone resin molds can last for a significant period. On average, with regular but not overly frequent use, they can be used around 50 - 100 times. In terms of years, if used moderately (say, a few times a month), they can last for 2 - 5 years. However, several factors can influence their lifespan. High - frequency use, for example, using the mold on a daily basis, will naturally wear it out faster. Aggressive cleaning methods can also damage the mold. Using abrasive cleaners or rough scrubbing tools can scratch the surface of the silicone resin mold, reducing its flexibility and durability over time.
Can silicone resin molds be used with all types of resins?
Silicone resin molds are compatible with many common types of resins, such as epoxy resins, polyester resins, and polyurethane resins. These resins can be easily poured into the silicone resin molds, and once cured, can be removed without much hassle due to the mold's non - stick and flexible properties. However, there are some special - purpose resins that may have compatibility issues. For instance, certain high - temperature - curing resins that require extremely high temperatures (above the heat - resistance limit of the silicone resin mold, usually over 300°C) can damage the mold. In such cases, it's advisable to use a mold made of a more heat - resistant material like metal. If you're unsure about the compatibility of a particular resin with your silicone resin mold, it's a good idea to do a small - scale test first.
How do I clean and maintain silicone resin molds?
Cleaning silicone resin molds is relatively straightforward. First, remove any excess material from the mold while it's still soft or after it has fully cured and can be easily peeled off. Then, use a mild detergent mixed with warm water. Gently scrub the mold with a soft - bristle brush or a sponge. Avoid using harsh chemicals like bleach or strong solvents, as they can degrade the silicone material. After cleaning, rinse the mold thoroughly with clean water and let it air - dry completely.
For maintenance, always store the silicone resin mold in a cool, dry place away from direct sunlight. Sunlight can cause the silicone to degrade over time, losing its flexibility and potentially changing its shape. When not in use, avoid stacking heavy objects on top of the mold to prevent it from getting deformed. If you're storing the mold for an extended period, you can also dust it with a small amount of cornstarch to prevent the surfaces from sticking together.